• HOME
  • ABOUT
  • BLOG
  • CONTACT
  • FEATURES
  • PARTIES I LINK TO

Nannycraft4u

Make your handmade dreams a reality - Just ask Nanny!

  • CHARITY PROJECTS
  • TUTORIALS
    • BAGS,POUCHES,ROLLS,WALLETS
    • EMBROIDERY
    • HOME/DECOR
    • LET’S SEW
    • QUILTING TUTORIALS
    • SPIN THE PINS
    • TOYS
    • WOTZA WEDNESDAY
  • SEWING/QUILTING
    • SIMPLE PROJECTS
    • TIPS & TOOLS
  • RECIPES
  • NANNY CHAT
  • NANNY & POPPY PROJECTS
    • CRAFT ROOM
    • HOUSE
    • TRAVEL
Home » BLOG

Make Book Ends

November 2, 2015 by Nanny 2 Comments

As it is now November (eek), I thought I would share some ideas for Christmas gift giving.  Today I am going to share with you how to make Book Ends.  These make a great gift and are a quick, easy project!

Recently I came across some mdf book ends on sale so I grabbed them. (You can easily cut some squares to suit and make your own)

This is how I finished them!

I had Poppy paint them white for me – I had a butterfly, a heart and a bird.

DSC05358


I then selected some paper combinations:

For the heart:

spot

and for the bird (I’m still waiting on a bedroom redo to finish the butterfly)

bird


I traced the shapes onto the paper and cut them out.

Nanny tip:  when you trace something and then cut it out, remember to cut to the inside of the tracing line to ensure it fits!

I then glued them in place

11049333_544702419005330_1762687537_n


DSC05359


DSC05360

and found some ribbons to trim.  I love the contrast between the spots and stripes on the hearts!

IMG_0434

Little green pompoms and some little eyes finished the birds – aren’t they cute!!

DSC05380

I was so happy with the results I wanted to share them with you – a quick, easy project that is sure to bring joy!


Until next time

Nanny xx


Please share:

  • Share on Facebook (Opens in new window) Facebook
  • Email a link to a friend (Opens in new window) Email
  • Share on X (Opens in new window) X
  • Share on Pinterest (Opens in new window) Pinterest

Filed Under: NANNY and POPPY PROJECTS, TOYS Tagged With: book ends, Chewbacca, gifts, Hans Solo, nannycraft4u, simple project, Star Wars

My First Quilt

October 29, 2015 by Nanny 2 Comments

Recently I attended my first ‘Quilter’s Zone Day’ and had a wonderful day sharing with fellow quilters from the North Coast of NSW, Australia.

We were asked to share any quilts we had that were at least 20 years old and so I took the first quilt I ever made – my first quilt.  It brought back so many memories I thought I would share it with you.

In the early 1980’s I became the co-ordinator of the local Adult Education Learning Centre – a centre that serviced the surrounding rural area.  I canvassed my friends, contacts etc to gauge interest areas for classes and one of the suggested areas was  a quilting class.

A tutor based in the closest city agreed to travel to our little centre if I got enough interest and you guessed it – we did!

Now to keep a long story short I joined the group and made my very first quilt.

I had no

STASH

ROTARY CUTTER

QUILTING RULER

SELF HEALING MAT

LOCAL QUILTING STORE

I did have

my GEOMETRY SET from school

GRAPH PAPER

SCISSORS

SCRAPS from making my clothes

I also had a friend who had a father who was a travelling fabric sales rep. He had passed on some of the fabric samples sheets to her and she in turn, passed them on to me.

With all that I set about to make my first quilt – it was supposed to be a single bed size but my fabric constraints meant that mine became a knee rug for my Grandmother!

The ‘plains’ were gabardine scraps from my ‘work’ clothes  and the ‘floral’ from the samples – look at those points!!

DSC05955

The yellow is more of a poplin

DSC05957

The backing looks like ‘drill’ and I can’t believe the quilting without a walking foot!

DSC05958

and look at those wide bindings! The wadding of course would have been that polyester, fluffy stuff…..

DSC05954

Never the less, it was much loved by my darling Grandma and it was returned to me on her passing.

DSC05959

and now resides permanently in my craft room, covering a table made using the base of Grandma’s old Singer – Oh  how I wish I still had that!!

The Farmer's Wife Set-up

What memories!

Thank you for letting me share – do you still have your first quilt?  I would love to see them and hear the stories that went with them!

Until next time

Nanny xx

Please share:

  • Share on Facebook (Opens in new window) Facebook
  • Email a link to a friend (Opens in new window) Email
  • Share on X (Opens in new window) X
  • Share on Pinterest (Opens in new window) Pinterest

Filed Under: NANNY CHAT Tagged With: Nanny's first quilt

The Farmer’s Wife 1930s Set-Up

October 23, 2015 by Nanny Leave a Comment


GnomeAngel.com

Hi!

Today I thought I would show you some things that I will use to make my Sew Along experience more enjoyable – The Farmer’s Wife 1930s set-Up!

I would have loved to be doing my piecing on my Mum’s treadle machine, but my back condition will not allow that so I am going to use my Featherweight.  Here she is, set up on a table made using the bottom of my Grandma’s treadle machine (unfortunately, at a time in its life that it needed some serious TLC, my Uncle left a window open and the weather ruined Grandma’s machine – I was able to rescue the base and it makes a lovely desk in my craft room!)

Mum’s treadley is sitting right next to us so we will all be ‘together’ – Mum was born in 1930!

DSC05972


I will be using my sand paper/glass paper board when I have to draw diagonals etc

003-300x225

My pressing board will be a real necessity

DSC04068-300x225

and my design board will make sure my pieces stay in the correct order as I construct the block!

Make a Design Board

Of course I need my book The Farmer’s Wife 1930’s and my computer – add to that my scissors, rotary cutter and rulers and the odd pin and I think that should get me there!

I am behind the schedule now following my Dad’s recent health issues, but will continue to plod along, be kind to myself and know that I will get there!

These are the blocks I have completed:

#12  BECKY

DSC05975

# 16  BONNIE

DSC05977

#8  AUNT

DSC05976

and #20  CAROLINE

DSC06020


I am really enjoying the process and hope that you will enjoy following along on the journey with me!

Until next time

Nanny xx


Please share:

  • Share on Facebook (Opens in new window) Facebook
  • Email a link to a friend (Opens in new window) Email
  • Share on X (Opens in new window) X
  • Share on Pinterest (Opens in new window) Pinterest

Filed Under: NANNY CHAT, TIPS/TOOLS Tagged With: Design Board, Pressing Board, quilt blocks, sand/glass paper board, The Farmer's Wife 1930s Sew Along

Quilt Blocks to Heal Violence

October 21, 2015 by Nanny 4 Comments

Hi!

I have joined some on-line quilters to make some Quilt Blocks to Heal Violence.  This project has been organised by @Jackie Gillies as a way for quilters to show in a practical manner, that we care.

Jackie is not a blogger, but her friend Ros from Sewdelicious has posted the details here and I encourage you to pop on over, have a read and lend your support!

The block is called Tictactoe and the details of the block construction can be found at Blossom Heart Quilts – thanks Alyce.

Basically, Jackie has asked for low volume backgrounds with a bright cross.

This is the first one I tried:

DSC05951

It is an easy block to construct and comes together in no time at all!

I love the ‘strength’ portrayed in this block – one of the girls described it as a Stop sign – STOP the violence and a Kiss – A KISS to show we care and I love that idea.

This is my second block

12027602_918981424861475_2205192299254085512_n

I love the way the quilting community pulls together – I held a Friday night, on-line sew- in  to make these and my local quilting group, the Plateau Quilters were keen to lend their support as well.

I think Jackie will be blown away by the support that will come from all over, and I am really glad to see that there is a willing group of helpers to take these blocks and transform them into quilts of love, warmth and comfort!

If you want to be involved , it’s not too late and even if you don’t have the time to sew, donations of wadding, backing and postage costs would be gratefully accepted – just follow this link or contact me.

Until next time

Nanny xx

Please share:

  • Share on Facebook (Opens in new window) Facebook
  • Email a link to a friend (Opens in new window) Email
  • Share on X (Opens in new window) X
  • Share on Pinterest (Opens in new window) Pinterest

Filed Under: CHARITY PROJECTS, NANNY CHAT Tagged With: nannycraft4u, quilt blocks, Quilt blocks to heal violence, quilting community, tictactoe

Candlewicking Adventure – How to Make a Colonial Knot

October 19, 2015 by Nanny 8 Comments

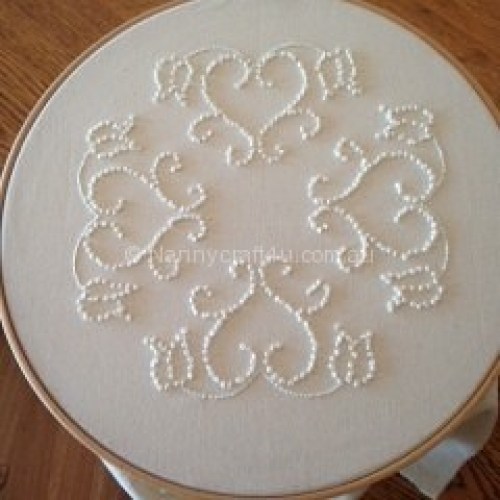
Some time ago I told you about my wonderful gift and how it has started me off on a Candlewicking adventure and so I thought it time to check in and show you my progress and show you my Candlewicking Adventure –  How to Make a Colonial Knot.

I have no order to follow with the blocks so just selected one and popped it in the hoop!

Now for those of you not familiar with the process of Candlewicking, it is simply a series of knots!  The pre-traced blocks look like this:

DSC06012

This is my third block’

Each little dot is where you make a knot and the closed lines are where I will be doing a backstitch.  The little  flowers are to be daisy stitch.

The knot is called a Colonial Knot and after a lot of searching and reading, I tried to follow a description of starting but found it too difficult so decided to use Nanny’s way of doing things and it is working fine.

I start off with a length of thread and bring my needle up from under the block into one of the dots – I have been coming up right on one edge of the dot.

DSC06013

You then wind the thread around the needle in a figure 8 – so first this way (do this by holding the thread in one hand and moving the needle over and under)

DSC06014

and then this way

DSC06015

I then insert the needle back down through the other side of the dot (you don’t want to go back down the same hole you came up from as there would be a possibility of the knot being pulled through)

DSC06016

You can see me pulling the thread so the knot forms down at the bottom of the needle.


DSC06017

You need to hold the thread taut as you pull the needle through to get uniform knots.

When my thread is nearing the end I take it to the back, insert it under the last stitch and tie it off and then weave it back along the row a bit. It is then ready to be trimmed.  I need to go back and do the same with the start of my thread as well.

This is the first block I finished

IMG_0071

I love how it looks and couldn’t wait to start on Block 2 and I have now completed block 2 as well!

IMG_0171

I find this process really relaxing and it is something I can do at night (in front of the telly) quite comfortably as the hoop just sits on my lap.  Do you have a ‘switch off’ activity? What do you like to do ‘in front of the telly’?

I would love to hear from you (so I know I’m not chatting to myself) so please leave a comment.  I love it when you do and I will always reply just as soon as I can.

Until next time

Nanny xx


Please share:

  • Share on Facebook (Opens in new window) Facebook
  • Email a link to a friend (Opens in new window) Email
  • Share on X (Opens in new window) X
  • Share on Pinterest (Opens in new window) Pinterest

Filed Under: EMBROIDERY, NANNY CHAT Tagged With: Candlewicking, Colonial Knot, long term project, nannycraft4u

  • « Previous Page
  • 1
  • …
  • 6
  • 7
  • 8
  • 9
  • 10
  • …
  • 45
  • Next Page »

© Nannycraft4u

All content and images belong to Nannycraft4u unless otherwise indicated. You are welcome to link back to my blog, but you may not copy whole posts, tutorials or photos without my permission. Please give credit for my work and link back to the original post at Nannycraft4u.com If you use one of my ideas, I would love to know about it. Designs and tutorials are for personal use only.

Copyright © 2026 · Lifestyle Pro Theme on Genesis Framework · WordPress · Log in