• HOME
  • ABOUT
  • BLOG
  • CONTACT
  • FEATURES
  • PARTIES I LINK TO

Nannycraft4u

Make your handmade dreams a reality - Just ask Nanny!

  • CHARITY PROJECTS
  • TUTORIALS
    • BAGS,POUCHES,ROLLS,WALLETS
    • EMBROIDERY
    • HOME/DECOR
    • LET’S SEW
    • QUILTING TUTORIALS
    • SPIN THE PINS
    • TOYS
    • WOTZA WEDNESDAY
  • SEWING/QUILTING
    • SIMPLE PROJECTS
    • TIPS & TOOLS
  • RECIPES
  • NANNY CHAT
  • NANNY & POPPY PROJECTS
    • CRAFT ROOM
    • HOUSE
    • TRAVEL
Home » TUTORIALS » EMBROIDERY

Candlewicking Adventure – How to Make a Colonial Knot

October 19, 2015 by Nanny 8 Comments

Some time ago I told you about my wonderful gift and how it has started me off on a Candlewicking adventure and so I thought it time to check in and show you my progress and show you my Candlewicking Adventure –  How to Make a Colonial Knot.

I have no order to follow with the blocks so just selected one and popped it in the hoop!

Now for those of you not familiar with the process of Candlewicking, it is simply a series of knots!  The pre-traced blocks look like this:

DSC06012

This is my third block’

Each little dot is where you make a knot and the closed lines are where I will be doing a backstitch.  The little  flowers are to be daisy stitch.

The knot is called a Colonial Knot and after a lot of searching and reading, I tried to follow a description of starting but found it too difficult so decided to use Nanny’s way of doing things and it is working fine.

I start off with a length of thread and bring my needle up from under the block into one of the dots – I have been coming up right on one edge of the dot.

DSC06013

You then wind the thread around the needle in a figure 8 – so first this way (do this by holding the thread in one hand and moving the needle over and under)

DSC06014

and then this way

DSC06015

I then insert the needle back down through the other side of the dot (you don’t want to go back down the same hole you came up from as there would be a possibility of the knot being pulled through)

DSC06016

You can see me pulling the thread so the knot forms down at the bottom of the needle.


DSC06017

You need to hold the thread taut as you pull the needle through to get uniform knots.

When my thread is nearing the end I take it to the back, insert it under the last stitch and tie it off and then weave it back along the row a bit. It is then ready to be trimmed.  I need to go back and do the same with the start of my thread as well.

This is the first block I finished

IMG_0071

I love how it looks and couldn’t wait to start on Block 2 and I have now completed block 2 as well!
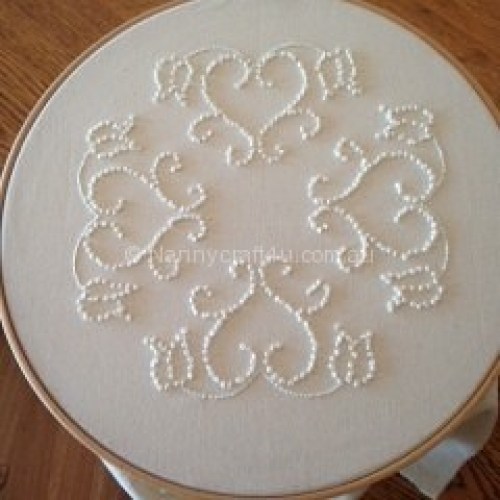
IMG_0171

I find this process really relaxing and it is something I can do at night (in front of the telly) quite comfortably as the hoop just sits on my lap.  Do you have a ‘switch off’ activity? What do you like to do ‘in front of the telly’?

I would love to hear from you (so I know I’m not chatting to myself) so please leave a comment.  I love it when you do and I will always reply just as soon as I can.

Until next time

Nanny xx


Please share:

  • Share on Facebook (Opens in new window) Facebook
  • Email a link to a friend (Opens in new window) Email
  • Share on X (Opens in new window) X
  • Share on Pinterest (Opens in new window) Pinterest

Filed Under: EMBROIDERY, NANNY CHAT Tagged With: Candlewicking, Colonial Knot, long term project, nannycraft4u

Let’s sew 20 – Embroidery 5 – Blanket Stitch

February 20, 2013 by Nanny 1 Comment

Good morning!
Today we will be doing Blanket Stitch.

What you need:

Your Sampler square
Embroidery thread/floss
Crewel needle
Sharp scissors
Erasable pen ( I used a Pilot Frixion Ball – available at supermarkets for a couple of dollars)

Nanny edit: Please see new, detailed info re these pens here and decide for yourself re their use.

Let’s Sew!

With the erasable pen, rule a line 2 and 1/4″ from the top and another at 2 and 1/2″

( Using 2 strands and starting from the left side if you are right handed)
Working on the bottom line, do a double stitch 1″ from the fabric edge, bringing the needle to the start of the line.

Insert needle on top line, across about 1/4″ from start of line and bring needle out straight under on the bottom line.

Loop thread under needle

Pull gently to complete stitch

Repeat process and work across until you finish the row or run out of thread


If you run out of thread, finish the stitch by taking the needle through to the back just to the right of where the needle came out.


Back of work

Take a very small stitch and through the loop to anchor it.

Trim thread and turn to front


Front of work 

Take 2-3 very small stitches towards the stitching, needle coming out to the left of the upright

Continue blanket stitches to the end
Finish last stitch by inserting needle just to the right of the upright and coming out 1/4″ away towards the fabric edge
Do a double stitch
Trim thread

Rule another line 4″ from the top of fabric
Using the removable cap of the pen as a template, trace a circle

With 2 strands, start with a double knot as before, bringing needle out in the centre of the circle

Make a blanket stitch, using the centre of the circle as ‘the top line’

Continue around the circle, inserting needle at the centre for each stitch and bringing it out on the circle,  a little to the right each time

Complete the last stitch as before, taking needle to the back.  Anchor thread and trim.  Press.


This is how we will do the eyes on the Dolly.
Until next time
Nanny xx


Please share:

  • Share on Facebook (Opens in new window) Facebook
  • Email a link to a friend (Opens in new window) Email
  • Share on X (Opens in new window) X
  • Share on Pinterest (Opens in new window) Pinterest

Filed Under: EMBROIDERY, LET'S SEW, TUTORIALS

Let’s Sew 19 – Embroidery 4 – Backstitch

February 20, 2013 by Nanny 1 Comment

Good morning!
Today we will try our hand at another stitch – the Backstitch.  This is a strong stitch and is used a lot in hand sewing.

What you will need:

Your Sampler square (from Embroidery 3 – Running Stitch)
Embroidery thread/floss
Crewel needle
Sharp scissors
Erasable pen ( I used a Pilot Frixion Ball – available at supermarkets for a couple of dollars)

Nanny edit:  Please see new, detailed info re these pens here and decide for yourself re their use.

Let’s Sew!

With your erasable pen, rule a line at 3.5″ from the top of your Sampler Square.

Using 2 strands, take a little stitch about an inch in from the edge.

Repeat bringing your needle out a stitch length past the start of the line (about 1/8″)

Put your needle ‘back’ down through the start of the line and back up the same distance away so that your thread is in the centre

Now go ‘back’ to that stitch inserting the needle in the same hole (see where the needle is pointing)and bring the needle up the same distance away again.


TIP:  When you put your needle ‘back’, hold it straight up so you can accurately get it in the same hole at the end of the stitch.  This will give a neater finish.

You can see in this photo that I haven’t succeeded, trying to get a photo…

Continue till the end of the row or until you ‘run out of’ thread.
If you run out of thread, finish the last stitch, taking the needle to the back and turn your work over to the back.

Backview

Slip needle under last stitch

and through the loop formed

Pull through gently.
Run needle under the last couple of stitches

Trim  threads

Turn work back to the front and rethread needle

Take 2-3 very small stitches along the line, needle coming out a stitch length away from stitching

Continue stitching as before straight over those small stitches

At end of row, complete last stitch, needle coming out 1/4″ away and double stitch.

Trim thread to edge of fabric


Press on the back

The Back Stitch is a great outline forming stitch.  It is a single row of stitches on the front but when you turn it over you will notice that it is double.
We will use this to complete the mouth, nose and eye outline on our Dolly.

Until next time
Nanny xx

Please share:

  • Share on Facebook (Opens in new window) Facebook
  • Email a link to a friend (Opens in new window) Email
  • Share on X (Opens in new window) X
  • Share on Pinterest (Opens in new window) Pinterest

Filed Under: EMBROIDERY, LET'S SEW, TUTORIALS

Let’s Sew 18 – Embroidery 3 – Running Stitch

January 21, 2013 by Nanny Leave a Comment

Good afternoon!

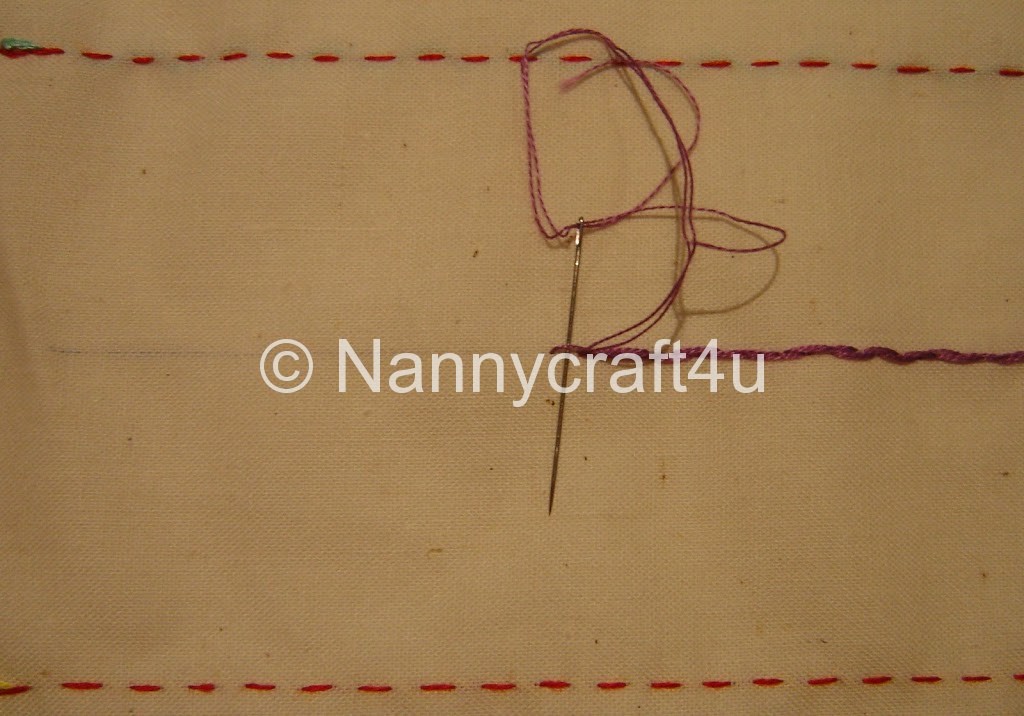
Today we will start our basic embroidery stitches by looking at the Running Stitch.  This is the easiest of stitches but can be decorative in its simplicity.  This stitch is used: to ‘tack’ pieces together while you  sew as it is easily removed;  as a gathering stitch; and in a larger size, to decorate clothing.  I also use this stitch to outline detail on padded pictures and  in my hand quilting.

What you will need:

A 8″ square of light coloured cotton – I am using quilters muslin (we will use this as a ‘sampler’adding each of our stitches and then we will use it in a project at a later date)
Crewel needle
Embroidery thread/floss – you choose the colours!
Sharp scissors
Erasable pen ( I used a Pilot Frixion Ball – available at supermarkets for a couple of dollars)

Nanny edit:  Please see new, detailed info re these pens and their use here and then decide if you want to use them

Rule

Let’s Sew!

Take the fabric square and, using your erasable pen, rule a line across at 2″ from the top, starting and finishing 1″ in from the side edges.
Cut a 12-15″ length of thread and separate 2 strands
Thread the needle.

If you are right handed, you will start on the right and stitch towards the left.  Likewise, if you are left handed, you will start at the left and stitch towards the right.  I will give instructions for right handed – if you are a           ‘lefty’ just make the change.

Now because we are completing a sampler, we will  use a double stitch to secure the beginning;

Insert your needle from the right side about 1/4″from the start of the stitching line and take a small stitch, leaving a ‘tail’ of thread out to the edge of the fabric.

Repeat to form a stitch
Repeat again, this time coming up at the start of the sewing line.

Take a stitch (about 1/8″) and bring the needle up the same distance ahead (I am twisting the needle so you can see)

You have made a running stitch.

Continue  down, up, down, to the end of the row

Take the needle down at the end of the line and back out 1/4″ away.

Take a small stitch towards the side and repeat to finish.

Trim thread to edge of fabric. (Which I haven’t done yet)

We can decorate this simple stitch by either ‘weaving’ it or ‘whipping’ it!
Mark a line and complete another row of running stitch at 5″ from the top.

Take a length of a different coloured thread, separate 4 strands and thread the needle.

Start with a small stitch right beside the double stitch of the running stitch

Repeat and bring the needle up half way between the double stitch and the start of the running stitch

To ‘weave’ the running stitch, we are going to work on the top of the fabric (you do not take the needle through the fabric).  You will just slip your needle under the running stitch from the top

Now slip it under the next running stitch from the bottom

Then the top

Continue working  across the running stitches weaving up and down to the end.

Finish with a double stitch and trim the thread to the edge of the fabric

Change the colour again, still using 4 strands, and move to the other row of running stitch.

Start the same way, with a double stitch coming up half way between the double knot and the first stitch.

We will ‘whip’ the running stitch in the same way as the ‘weave’ except we will  be going under each stitch from the top each time.

Finish with a double stitch and trim the threads to the edge of the fabric.

Tip: When you press embroidery, you press the back of the fabric!

All the lines disappear with the heat (you have to love these pens!!)

You have made a great start!  I hope you enjoyed this little taste of embroidery ……

Until next time
Nanny xx

Please share:

  • Share on Facebook (Opens in new window) Facebook
  • Email a link to a friend (Opens in new window) Email
  • Share on X (Opens in new window) X
  • Share on Pinterest (Opens in new window) Pinterest

Filed Under: EMBROIDERY, LET'S SEW, SEWING/QUILTING, TUTORIALS

Let’s Sew 17 – Embroidery 2 – Starting and finishing

January 16, 2013 by Nanny 3 Comments

Good evening!

I want to show you something that I just found – examples of my work from primary school days (over 50 years ago – but don’t tell! )

Don’t you love it!  A needle case, a draw string bag to hold our sewing gear and a placemat – maybe this was a 50’s mug mat!!

Today I am going to show you how to start and finish your embroidery so that it does not come undone and then you will be able to show it to someone in 50 years time!

The Knot
This is perhaps the easiest way to start any stitching.  With 3 strands, thread your needle and in one end, tie a knot.

An easy way to do this is to wrap the end around your pointer finger until it overlaps

Cover the overlap with your thumb and roll it between your finger and thumb a couple of times

Now holding the twists between your thumb  and middle finger( a fingernail helps), slide them to the left and

Ta da!  You have a knot!

The disadvantages of the knot are that it could come undone and it looks a little unsightly.

One way to make use of the knot is to use it away from your work.  Let me explain…….

I want to stitch on the blue line so I will put my
needle through to the back about 4″ (10cm) away from where I want to start.

Bring the needle back to the front where you want
to start

Stitch to the end and put needle through to the back

 Pass the needle under the last stitch and through the
loop formed to make a knot

                                                                                       Oversew a couple of stitches and trim the thread
Now that’s nice and neat!

 Snip the starting knot from the front


Turn to the back and finish this end off the same way – loopknot, oversew and snip.

Finished back,

Finished front.

This is the method of starting and finishing that we will be using in the making of the Let’s Sew Dolly!

Until next time
Nanny xx

Please share:

  • Share on Facebook (Opens in new window) Facebook
  • Email a link to a friend (Opens in new window) Email
  • Share on X (Opens in new window) X
  • Share on Pinterest (Opens in new window) Pinterest

Filed Under: EMBROIDERY, LET'S SEW, SEWING/QUILTING, TUTORIALS

  • 1
  • 2
  • Next Page »

Welcome!

Welcome! I am Nanny and this is where I like to share my crafting as well as other snippets of our life in Australia. Read more

Social

Follow me on:

Like a Newsletter?

My Button4u

grab button for Nannycraft4u
<div class="nannycraft4u-button" style="width: 150px; margin: 0 auto;"> <a href="http://www.nannycraft4u.com.au" rel="nofollow"> <img src="http://i1168.photobucket.com/albums/r482/Nannycraft4u/logo8-001.jpg" alt="Nannycraft4u" width="150" height="150" /> </a> </div>

Looking for something?

Australian Women Bloggers Directory by Blog Chicks

Subscribe to Blog via Email

Enter your email address to subscribe to this blog and receive notifications of new posts by email.

Follow on Facebook

Follow on Facebook

Favourites

  • Let's Sew 23 - How to make a simple Library Tote
    Let's Sew 23 - How to make a simple Library Tote
  • Curtain Tie Backs
    Curtain Tie Backs
  • Make a lined,ruffle top, drawstring bag.
    Make a lined,ruffle top, drawstring bag.
[instagram-feed]

Meta

  • Log in
  • Entries feed
  • Comments feed
  • WordPress.org

© Nannycraft4u

All content and images belong to Nannycraft4u unless otherwise indicated. You are welcome to link back to my blog, but you may not copy whole posts, tutorials or photos without my permission. Please give credit for my work and link back to the original post at Nannycraft4u.com If you use one of my ideas, I would love to know about it. Designs and tutorials are for personal use only.

Copyright © 2026 · Lifestyle Pro Theme on Genesis Framework · WordPress · Log in