• HOME
  • ABOUT
  • BLOG
  • CONTACT
  • FEATURES
  • PARTIES I LINK TO

Nannycraft4u

Make your handmade dreams a reality - Just ask Nanny!

  • CHARITY PROJECTS
  • TUTORIALS
    • BAGS,POUCHES,ROLLS,WALLETS
    • EMBROIDERY
    • HOME/DECOR
    • LET’S SEW
    • QUILTING TUTORIALS
    • SPIN THE PINS
    • TOYS
    • WOTZA WEDNESDAY
  • SEWING/QUILTING
    • SIMPLE PROJECTS
    • TIPS & TOOLS
  • RECIPES
  • NANNY CHAT
  • NANNY & POPPY PROJECTS
    • CRAFT ROOM
    • HOUSE
    • TRAVEL
Home » SEWING/QUILTING » TIPS/TOOLS » Page 6

Lets Sew Part 3 – Which foot first?

October 9, 2012 by Nanny Leave a Comment

Put Your Best Foot Forward  – but which one????

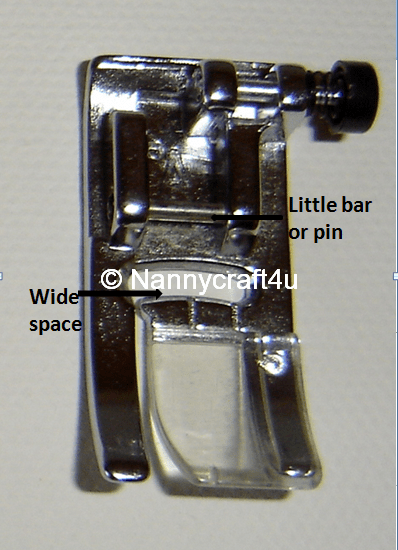
To start our adventure, we are going to use the following foot:

You can see the wide opening that allows us to use straight stitching or zigzag without changing the foot.
If you check your feet, I’m sure you will find one that fits the bill (or should that be the leg??)
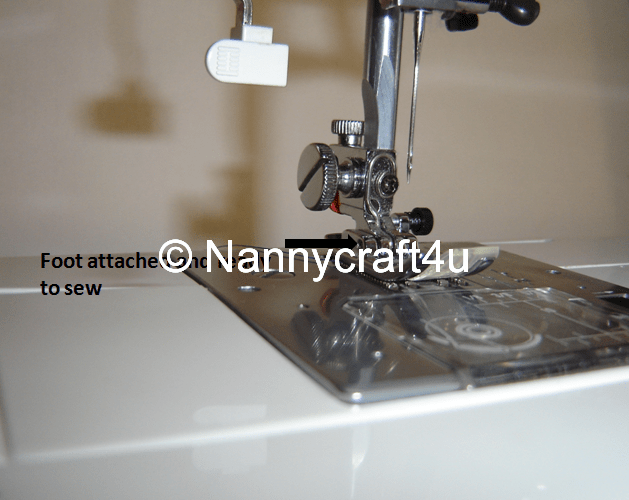
Let’s attach our foot now!
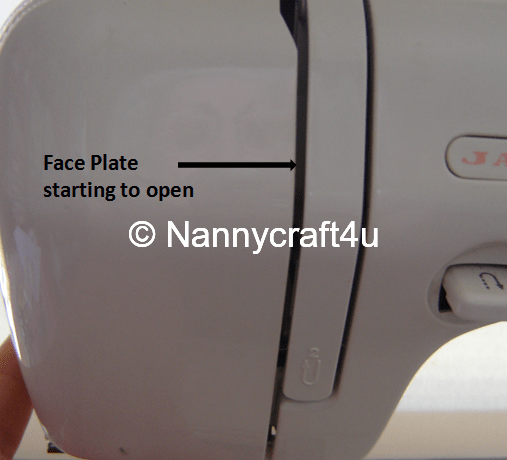
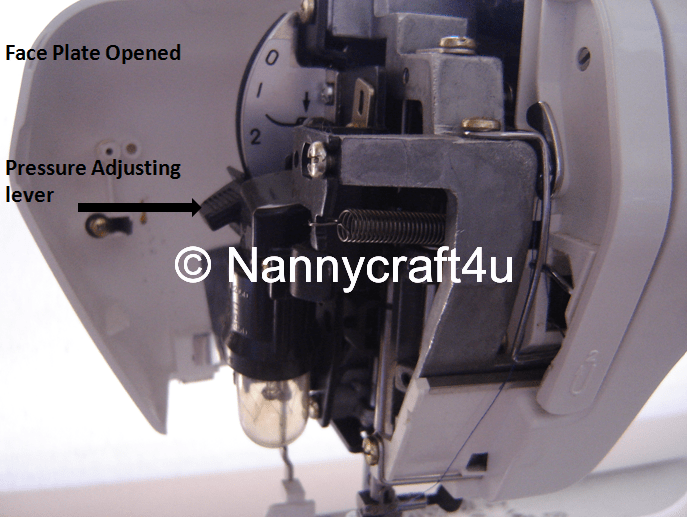
To attach any foot on Betsy, I have to ensure that the Pressure Adjusting Lever is at level 3.  This is found in behind the Face Plate.  This stays set on 3 for regular stitching.

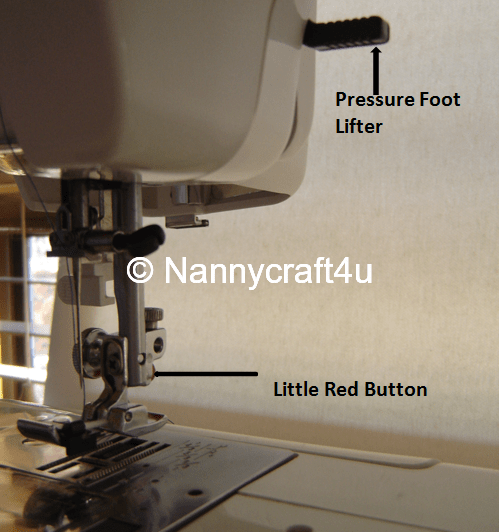
Note the Pressure Foot Lifter – Betsy has hers on the inner side but some machines have it at the back.  This we use to lift the foot so that we can change it over.

I turn the Balance Wheel to raise the needle to its highest position.

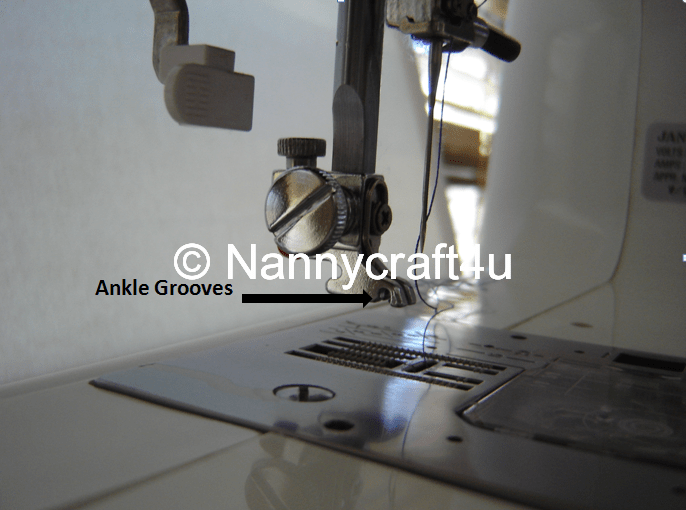
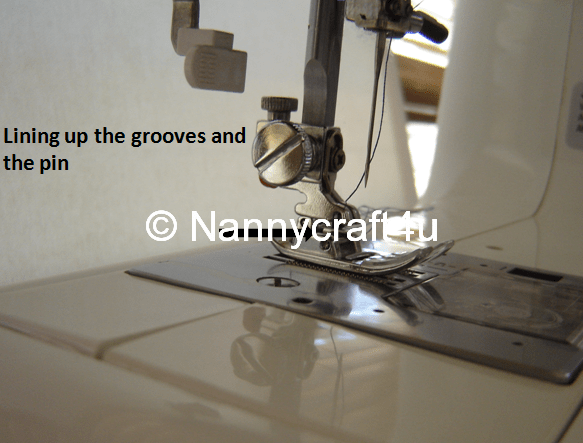
Betsy has a red button round back and when this is pressed, the foot falls off.  I then take the  foot that I’m going to use and sit it under the ankle grooves.
(I’m not kidding it really is called the ankle!! – where else would you join a foot??!)
The ankle grooves sit on the little bar and click into place when you lower the Pressure Foot Lifter .  Notice I said lower the Pressure Foot Lifter – don’t let it clunk into place – be gentle!!

Just before I go, I realised that I forgot to introduce you to the Mother Machine -‘ Biddy’!  This was a 21st birthday present to Mum from Dad and yes, even though mum has a lovely name – Carmel Josephine – she has always been known as Bid!
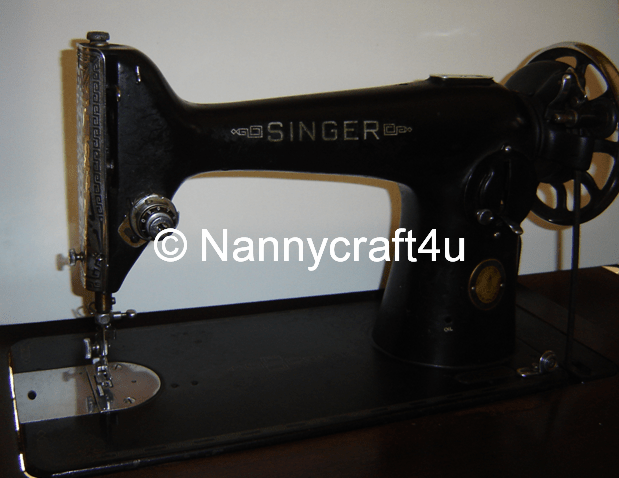
So if you are sewing on a ‘Biddy’ you will have a foot that looks like this:
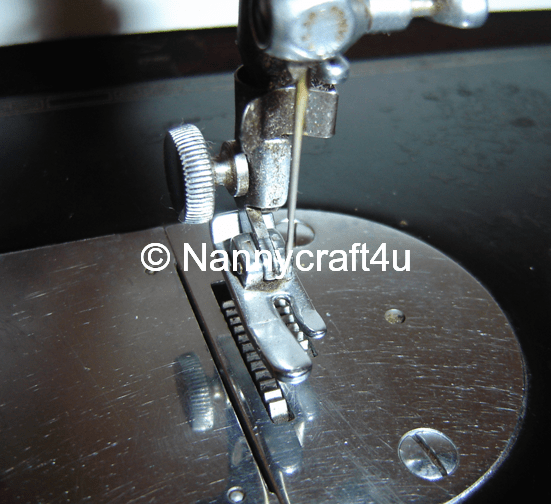
and it will do the job of straight sewing just as well as the newer one on Betsy!!
Until next time
Nanny 🙂

Please share:

  • Share on Facebook (Opens in new window) Facebook
  • Email a link to a friend (Opens in new window) Email
  • Share on X (Opens in new window) X
  • Share on Pinterest (Opens in new window) Pinterest

Filed Under: LET'S SEW, SEWING/QUILTING, TIPS/TOOLS, TUTORIALS

Let’s Sew Part 2 – Threading Your Machine

October 9, 2012 by Nanny Leave a Comment

Good morning!
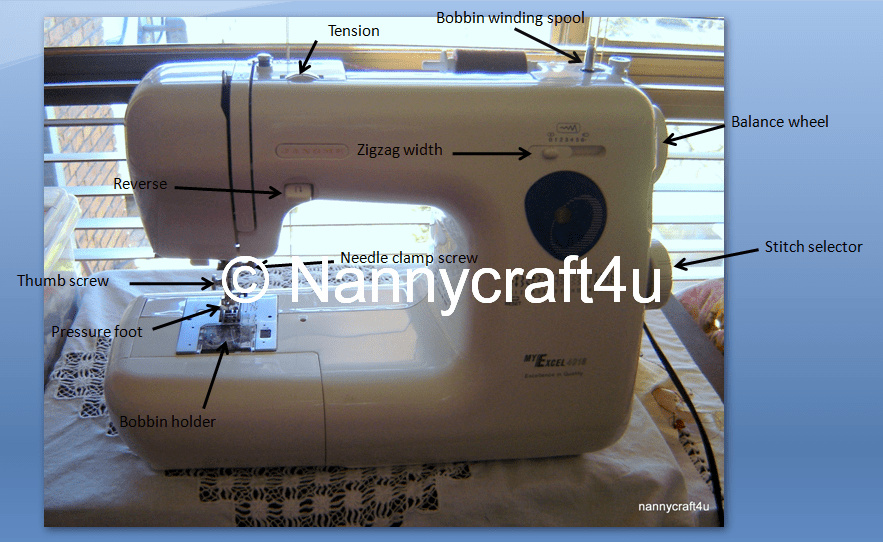
I promised you an introduction to my Betsy so here she is:

  
I have taken a photo of Betsy to help me show you some of the most obvious bits and pieces of her anatomy –  like Nanny, Betsy is really old  getting on in years, but can still mix it with the younger ones.  J
Together, we have sewn everything including clothes, quilts, curtains, bags, toys and have spent many happy hours together.
Now I know you have been reading your manuals, so even if you have a different machine, you should be able to find the same sort of thing on yours too!
To prepare for sewing, we need to wind a bobbin and thread the machine – most machines have easy to follow directions for both of these jobs so here are a couple of tips:
If you look closely at your bobbin, you will notice a little hole on each side.  Take the thread and feed through the hole from the inside of the bobbin out.  Then, holding that, wind the thread around the bobbin a few times.
Now put the bobbin onto the bobbin spool, and following your manual instructions, wind your bobbin.  When the bobbin is full, remove it and snip that thread through the hole off as close to the bobbin as you can.  Your bobbin is now ready to put into the bobbin holder.

To thread your machine start by putting the spool onto its holder. 
Tip:  If your spool is lying down like the one on Betsy, put it so that the thread pulls away from the grooved end of the spool – this will stop the thread catching and jamming.

Now we need to lift the bobbin thread.  Holding the needle thread in your left hand, wind the balance wheel slowly towards you until the needle goes down and back up.  There you will see a loop over the thread you are holding – that is the bobbin thread- so pull the loop until you get the end out, then take both the needle and bobbin threads under the presser foot and towards the back.

Practise threading your machine so that you are able to easily do all of these steps and next time we will look at the stitches and do some sewing!
Until next time
Nanny  🙂

Please share:

  • Share on Facebook (Opens in new window) Facebook
  • Email a link to a friend (Opens in new window) Email
  • Share on X (Opens in new window) X
  • Share on Pinterest (Opens in new window) Pinterest

Filed Under: LET'S SEW, SEWING/QUILTING, TIPS/TOOLS, TUTORIALS

Nanny gets pinned!

May 15, 2012 by Nanny 6 Comments

I made a circus themed quilt for a showcase earlier this year and decided that I would take some photos so I could show you how I pin my quilts!!!

What do I mean “pin my quilts”?
When making a quilt I need to sandwich together the completed quilt top, the wadding of choice and the quilt backing.  I use pins to hold these layers steady as I quilt (sew) them together.

What I need:

1.  Poppy!  My wonderful husband fetches my fold up tables (these are stored behind the storage shelves in my craft room) and then lifts them onto very tasteful paint tins!  If you ‘know’ me you know that I have chronic back pain, and without Poppy doing this for me, I would not be able to do my pinning!  Poppy now knows how to pin as well!

2.  Tape – this is packaging tape but have used masking tape as well.

3. Pins – not straight pins but quilting pins(like a safety pin) – you can purchase at any craft store

You will notice that I store them open – they are ready to insert in the quilt and when I remove them, I leave them open,ready for the next quilt – saves time and fingers!
4  Pin closer – this is a purpose built tool – mine is actually made from Australian Red Cedar (gift made by a friend from some of my dad’s stash). You can buy these as well but before I had this I used a spoon!
5.  The quilt top, the wadding and the backing fabric.
——————————————————————————————————-
Let’s start Pinning!
1. Spread your backing fabric, right side down onto your table (or floor) and using the tape, tape it down.    Take care to spread the fabric well, leaving no puckers – taut but not stretched.
.

2. Spread the wadding over the backing fabric.

3. Add the quilt top – right side up!

4.  Starting at the centre, smoothing quilt top as you go, pin to the edge down and across.  Then I usually work one corner at a time , smoothing, pinning  about  15cms apart and leaving the pins open….

5. When the whole quilt has been pinned, it is time to close the pins.  Using the tool or the spoon, close the pins.

 It is then time to remove the tape – your quilt is pinned and ready to take to the machine!!

Now, I am not saying that this is the only way, or the correct way to pin a quilt but this is how Nanny does it – works for me …

Until next time
Nanny xxPinning a Quilt

Please share:

  • Share on Facebook (Opens in new window) Facebook
  • Email a link to a friend (Opens in new window) Email
  • Share on X (Opens in new window) X
  • Share on Pinterest (Opens in new window) Pinterest

Filed Under: QUILTING TUTORIALS, SEWING/QUILTING, TIPS/TOOLS, TUTORIALS

  • « Previous Page
  • 1
  • …
  • 4
  • 5
  • 6

Welcome!

Welcome! I am Nanny and this is where I like to share my crafting as well as other snippets of our life in Australia. Read more

Social

Follow me on:

Like a Newsletter?

My Button4u

grab button for Nannycraft4u
<div class="nannycraft4u-button" style="width: 150px; margin: 0 auto;"> <a href="http://www.nannycraft4u.com.au" rel="nofollow"> <img src="http://i1168.photobucket.com/albums/r482/Nannycraft4u/logo8-001.jpg" alt="Nannycraft4u" width="150" height="150" /> </a> </div>

Looking for something?

Australian Women Bloggers Directory by Blog Chicks

Subscribe to Blog via Email

Enter your email address to subscribe to this blog and receive notifications of new posts by email.

Follow on Facebook

Follow on Facebook

Favourites

  • Curtain Tie Backs
    Curtain Tie Backs
  • Let's Sew 23 - How to make a simple Library Tote
    Let's Sew 23 - How to make a simple Library Tote
  • Make a lined,ruffle top, drawstring bag.
    Make a lined,ruffle top, drawstring bag.
  • Make a 9 patch block for Fire victims
    Make a 9 patch block for Fire victims
[instagram-feed]

Meta

  • Log in
  • Entries feed
  • Comments feed
  • WordPress.org

© Nannycraft4u

All content and images belong to Nannycraft4u unless otherwise indicated. You are welcome to link back to my blog, but you may not copy whole posts, tutorials or photos without my permission. Please give credit for my work and link back to the original post at Nannycraft4u.com If you use one of my ideas, I would love to know about it. Designs and tutorials are for personal use only.

Copyright © 2026 · Lifestyle Pro Theme on Genesis Framework · WordPress · Log in