• HOME
  • ABOUT
  • BLOG
  • CONTACT
  • FEATURES
  • PARTIES I LINK TO

Nannycraft4u

Make your handmade dreams a reality - Just ask Nanny!

  • CHARITY PROJECTS
  • TUTORIALS
    • BAGS,POUCHES,ROLLS,WALLETS
    • EMBROIDERY
    • HOME/DECOR
    • LET’S SEW
    • QUILTING TUTORIALS
    • SPIN THE PINS
    • TOYS
    • WOTZA WEDNESDAY
  • SEWING/QUILTING
    • SIMPLE PROJECTS
    • TIPS & TOOLS
  • RECIPES
  • NANNY CHAT
  • NANNY & POPPY PROJECTS
    • CRAFT ROOM
    • HOUSE
    • TRAVEL
Home » SEWING/QUILTING » Page 4

Spin the Pins – Kayarna’s Hand Sanitizer Holder

June 25, 2015 by Nanny 7 Comments


Spin the pins


image29 (1)


It has been a while since we have had a spin and I am very excited today to introduce my guest, Kayarna Pepper.  Kayarna is a member of my Facebook group where we have all been sharing projects we have been working on.  I asked if anyone would like to share a project on my blog and Kayarna volunteered to Spin the Pins and share her take on making a Hand Sanitizer Holder.  Kayarna has never written a tutorial before, but has done a fantastic job.  I’m sure you will enjoy this project – Spin the Pins – Kayarna’s Hand Sanitizer Holder!!

Hand Sanitizer Holder.

What you need:

  • 2 x Coordinating fabrics of your choice. I used quilting cotton.
  • Depending on fabric choice, you may need fusible interfacing.
  • Elastic – approximately 1” wide
  • Coordinating thread
  • Rotary cutter or scissors
  • Ruler
  • Removable marker
  • Iron
  • Seam ripper
  • Button to match fabric
  • Sewing machine
  • Small bottle of hand sanitizer (mine was 50ml)


  1. Cut 1 of each fabric and 1 of fusible interfacing to be 2 ½ “x 10 ”. Choose which one will be your outer and which one will be your lining. For mine, floral was outer and the polka dots is the lining.
  1. Cut an extra piece of your outer fabric to 2 ½ “ x 6 “. This will become your handle.
  1. Cut elastic to 3” long.

This is what you should end up with:

image1

  1. Iron interfacing to wrong side of outer fabric.

image4 - Copy

5.  Take your liner piece and with your removable marker mark half way and then from that line, make another line 1 5/8” inch from the half way line. Draw an “X” at the end of the liner closest to your last line.

image5

6.  Pin elastic along the 1 5/8” line. Match up the cut ends of elastic with the raw edges. Pin excess elastic in the middle to keep it out of the seam allowance.

  1. Press down ¼ “ of the “x” end of your lining towards the wrong side of the fabric and do the same with the outer fabric. If outer fabric is directional, make sure it’s the bottom of the fabric that you press under (my “x” has disappeared because my removable marker irons off)

image7

  1. Place liner and outer fabric right sides together, pin and then sew around all 3 sides, pivoting at corners using
    ¼ “ seam. Leave folded ends open. Trim all 4 corners


  1. Turn right side out. Push corners out and press.
  1. At this stage, I change the pin position. Pull elastic over so it is flush down the sides of the fabric. Set holder aside.

image11

  1. Take handle fabric. Fold one of the short ends over ¼ “ and press. Fold in half lengthways and press. Open it up to reveal a crease. Fold the 2 raw edges of the long sides to the middle fold line that you just created and press. Leave folded and then fold the whole piece in half lengthways, press and then topstitch down the 2 long sides and the short end that is tucked in pivoting at each corner.

image12

image13 - Copy

  1. Insert and pin raw edge of your handle piece about 3/8” into the open end of the holder. Make sure it is centered. Increase stitch length on your machine. Place holder under foot with the elastic side up and top stich around the whole holder ensuring to be careful going over the elastic as it can shift and won’t be level on both sides.

image14 - Copy

image15

image16

  1. Put a button hole in the end of the handle piece running along the length of the handle. TIP: Put a pin in the end of your button hole before using your seam ripper to open it up. This will prevent you from cutting right through the end.

image17

  1. Working on the other end of the holder, insert a button hole about ¾ “ from the end of the holder. This button hole must be across the width.

image18

  1. Now insert a button hole on the halfway mark you made earlier across the width your holder. It needs to just fall short of the top stitching.image19

16.  Fold in half and put removable marker through the center of your button hole at the end to mark where to sew your button on.

image22

17.  Sew button on.

image23

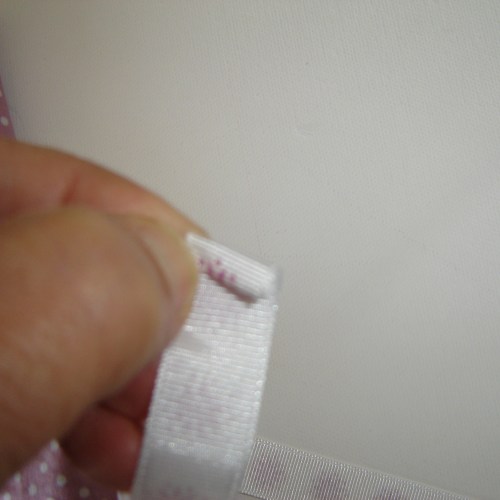
  1. Remove lid of sanitiser and insert bottle through the elastic and through the large button hole in the center. Replace lid. Attach handle to button and then fold the flap up and do up the last button.

image26

image27

image28 (1)

image29 (1)

  1. Hang on the interior or exterior of your bag to save you scrounging around for it when it would normally be lost in the bottom your bag.

image30 (1)

Fantastic Kayarna!!  I for one, can’t wait to make one or two or three!  Thank you so much for sharing with us!


If you make one of Kayarna’s Hand Sanitiser Holders please share a photo!


Until next time

Nanny xx

Linked to parties at Flamingo Toes , Lets Bee Social, Threading My Way

Please share:

  • Share on Facebook (Opens in new window) Facebook
  • Email a link to a friend (Opens in new window) Email
  • Share on X (Opens in new window) X
  • Share on Pinterest (Opens in new window) Pinterest

Filed Under: SIMPLE PROJECTS, SPIN THE PINS, TUTORIALS Tagged With: easy sew, hand sanitizer holder, nannycraft4u, simple project

Make a lined,ruffle top, drawstring bag.

June 9, 2015 by Nanny 10 Comments

My grand daughter was coming to visit over the long weekend and she asked if I could make her a bag to keep her character dance shoes in, so I thought I would share how to make a lined, ruffle top, drawstring bag.

DSC05681


Finished size:  Approx 9.5″  x  15″

What you need:

FQ Fabric for outside

FQ Fabric for lining

Ribbon

Cord

Beads


Let’s Sew!


1.  Take the FQ’s , fold in half and cut 4.5″ from the length (Or adjust to fit)

2.  Take the main fabric and with right sides together, sew down side and along the bottom.  Repeat for the lining fabric.

DSC05662 - Copy

Nanny note:  I zigzagged the lining fabric because it frays so easily.

3.  Turn the lining to the right side but leave the main fabric inside out.

DSC05663 - Copy

4.  Put the lining inside the bag (you will now have right sides together)

DSC05664 - Copy


5.  Starting by matching the side seams, pin the lining to the main and sew around the edge, leaving an opening for turning through.


DSC05665 - Copy


6.  Turn through

DSC05666 - Copy

7.  Push lining into the main bag and roll the seam between your thumbs and fingers to press.


DSC05668 - Copy


8.  Stitch around the top about 1 cm from the edge and again close to the edge.

DSC05669


9.  Take your ribbon and cut it the width of the bag.  You will need 2 pieces.

DSC05670


10.  Take the ribbons and fold over 1cm on each end and then over again.

DSC05673

11.  Stitch the ribbon ends

DSC05674

12.  Centre the ribbon on the bag and decide how far down you want to put it – mine is 2″ to the bottom of the ribbon.


DSC05675

13.  Stitch along the top and bottom of the ribbon, leaving the ends open.

DSC05676


14.  Take your cord – I realised I did not have enough and when I went shopping decided on this Satin finish one and I even found some little beads to add as a trim!

DSC05677

15.  Thread one ribbon through from the right, around and through the back .Thread the other from the left.

DSC05678 DSC05679


16.  Thread the beads and tie off

DSC05680 DSC05682

Cut isn’t it!

This is such a versatile bag – it can be used for everything from a small gift bag to a large Santa Sack – just vary the size as necessary!

Until next time

Nanny xx


Linking up with Threading My Way      SewCanDo

Please share:

  • Share on Facebook (Opens in new window) Facebook
  • Email a link to a friend (Opens in new window) Email
  • Share on X (Opens in new window) X
  • Share on Pinterest (Opens in new window) Pinterest

Filed Under: BAGS,POUCHES,ROLLS,WALLETS, NANNY CHAT, SIMPLE PROJECTS Tagged With: drawstring bag, Make a lined, nannycraft4u, ruffle top, simple project

Make a Ruffle Scarf

May 11, 2015 by Nanny 4 Comments

I have been asked, over the years, how I manage my crafting and my chronic pain and Fibromyalgia so today I thought I would share with you one of my ‘brainless’ crafts – these are things I can do where I don’t need to be able to think clearly, don’t need to calculate, don’t need to keep count, don’t need to cut with precision etc.  I will show you how I make a Ruffle Scarf.

It was a couple of years ago now, that I made my first Ruffle Scarf and I had that aha moment – I can still craft on my bad days if I find the right craft!!


What you need:

A ball of ruffle yarn (I am using Elicia from Lincraft)

A pair of knitting needles – I am using 6.5 – the size doesn’t affect the outcome so just use what you are comfortable with.


Let’s Craft!

I know that one ball makes a very long scarf – approx 2.3m and I am making these for Angels For The Forgotten so have decided to make them smaller.

1.  Take the ball of ruffling yarn

DSC05543

2.  Unravel it all and find the 2 ends

DSC05544

3.  Holding the two ends, slide through your hands to find the halfway mark and cut

DSC05545

4.  Put the end between your little finger and ring finger then around your thumb to form an 8 – keep wrapping in an 8

DSC05546


DSC05547

and you will end up with a nicely wrapped half ball!

DSC05548

In fact you will have two half balls!

DSC05549

5.  Take the first half ball and stretch the yarn open so you can see all the ‘holes’

DSC05550 - Copy

6.  Take a needle and ‘thread’ it from the back, through a ‘hole’, then around the back and through again until you have 5 stitches on the needle.

DSC05552 - Copy

7.  Put the other needle through the first stitch – in the photo below, you will see the needle through the stitch and the joined yarn beside the needle and then another ‘hole’

DSC05559 - Copy

8.  You take that next ‘hole’ and place it over the needle

DSC05560 - Copy

9.  Turn the needle through to ‘knit’ the stitch

DSC05561 - Copy

10.  Lift it off the needle to complete the ‘knit’

DSC05562

11.  Continue ‘knitting’ in this way until you get to about 8 ‘holes’ from the end.

12. Cast off

13.  I then tie both of the ends into a knot and trim.  You don’t really see this but if you do, this provides a neat finish.

DSC05564

DSC05565


So there you have them – two scarves all ready to keep some little neck warm this winter for 69 cents and some Nanny time.  They actually measure approx 57″ in length so could be worn by adults as well!


DSC05566

I would love to see if you decide to give them a try!

Until next time

Nanny xx

Please share:

  • Share on Facebook (Opens in new window) Facebook
  • Email a link to a friend (Opens in new window) Email
  • Share on X (Opens in new window) X
  • Share on Pinterest (Opens in new window) Pinterest

Filed Under: CHARITY PROJECTS, NANNY CHAT, SIMPLE PROJECTS Tagged With: knitting, ruffle scarf, scarf, simple project

Make Girl’s Bubble Shorts

April 28, 2015 by Nanny 5 Comments

Today I am going to show you how I used our shorts pattern to make girl’s bubble shorts with curved, gathered pockets for our little grand daughter, Jess.
What you need:
A shorts pattern (see how to make one here)
A Pocket Pattern (get one here)
Main fabric (I used a lovely soft denim)
Trim fabric
Sewing, cutting tools
Let’s Sew
1. Take the pattern and measure down the inside leg 2″ and then fold the pattern along from that  point.
2.  Place the pattern on the fold and cut 2.
Girls shorts
3.  Place the Pocket Pattern on the fold and cut 2.
4.  With right sides together, sew down the short edge and along the pocket bottom.  Trim corners and clip the curve.
5.  Turn to right side.
6.  Change the stitch length to gathering stitch and sew two rows of gathering stitch along the top of the pocket.
7.  Take the trim fabric and fold up from a corner like so:
8.  Cut along the line formed by the fold.  This will give us a bias cut. Cut 2 strips about 7.5″ long x 1.5″ wide.
9.  Fold in half and press.
 10.  Open out again and fold one edge over 1/4″
11.  Pin to top of pocket, gathering pocket to fit:
12.  Stitch along the fold line
 13.  Fold the other edge over 1/4″ and press – I finger pressed this.
14.  Fold folded edge to folded edge, right sides together.
and pin
15.  Stitch and trim seam
16.  Fold to the inside of the pocket and pin
You want the pin to appear as shown, at the bottom of the trim on the right side
17.  On the outside of the pocket, stitch in the ditch under the trim – you will see it catches the trim on the inside
but won’t be seen on the outside of the pocket!
18.  Position the pocket so that it fits down the side fold of the shorts, at a height that suits you remembering that we have to fold over the casing on the top for elastic.
19.  Sew a double row of stitching around the pockets’
20.   Continue to make the shorts as we did when we made the boxer shorts.
21.  Run two rows of gathering stitch around the leg bottom (as we did with the pocket trim)
22.   Measure around the leg about midway between the knee and crotch and cut 2 strips of trim fabric to that length plus 1.5″
23.  Join the ends to make a circle and press in half (as we did with the pocket trim), press over 1/4″ along one edge.
24.  Lining up the seam of the trim with the leg seam, pin around, gathering the shorts leg to fit.
25.  Stitch, trim , fold and finish as we did with the pocket trim.
26.  Take a length of the trim fabric, fold in half and stitch around edge leaving space to turn through to right side.
27.  Sew gap closed and attach the midpoint of the length to the centre back.
28.  Bring ties to front and tie a bow.
jess2
I loved the little flowers on the trim fabric so decided to press some heat and bond to a piece, cut out some flowers and attached them to a little top, finishing them off with buttons!
jess
Such a cute little outfit!!  I can’t believe that even though Jess loved wearing this outfit, we could not find a single photo to show you!  It is such a shame because they really looked much cuter on than I can possibly show in this photo. (one of the disadvantages of living apart from the models!)
If you make some Bubble Shorts, please share them with us!
Until next time
Nanny xx

Please share:

  • Share on Facebook (Opens in new window) Facebook
  • Email a link to a friend (Opens in new window) Email
  • Share on X (Opens in new window) X
  • Share on Pinterest (Opens in new window) Pinterest

Filed Under: LET'S SEW, SIMPLE PROJECTS Tagged With: Let's Sew, Make Girl's Bubble Shorts, simple project

Make a Red Poppy Brooch

April 24, 2015 by Nanny Leave a Comment

Tomorrow is ANZAC Day  and for those readers not familiar with this, it is a day that evokes many emotions in Australia. You can read all about it here!

The red poppy is taking a special place this year as we remember the 100th anniversary of the Gallipoli Campaign.  I actually found myself ‘lost’ in reading about the history surrounding the red poppy and I once again regretted that History was not an option for my high school studies  – it obviously clashed with my Maths or something and I became another Historian never to be!

Today, as I am not feeling well enough to quilt, I have decided to make a red poppy brooch for Mum and I to wear to the Anzac service to be held at the Aged Care Facility where Dad is a resident.  Anzac day has always been a special day to Dad and you can read about it here.

You still have time to make one too – it is so easy!

What You Need:

Red Felt

Matching embroidery floss

Black embroidery floss

A button (try to find one with a textured look)

A Brooch Pin

Sewing needle

DSC05488

Lets Sew!

1.  Find the pattern here.

2.  Cut the shapes from the felt

DSC05480

3.  Using 2 strands of the red embroidery floss, Stitch around the shapes using blanket stitch.  I pulled each stitch firmly to try to create an ‘edge’ on the petals.

DSC05481

4.  Run a row of stitches across the centre of the petals

DSC05483

5.  Gather it up and secure.

DSC05484

6.  Put the small petals on top of the large petals and secure. (I just sat the button on to see how it would look – it is not attached!)

DSC05485

7.  Take 2 threads of the black embroidery floss and, starting at the centre, backstitch a line out.  I tried to follow the ‘gathers’ and made sure the lines went out far enough to be seen when the button is added.  Don’t pull the stitches tightly or they will disappear into the felt (ask me how I know).  I ended each with a Colonial Knot.

DSC05486

8.  I thought the Poppy was looking a bit too flat, so to give it more dimension, I turned back the top petals and pulled the bottom petals together a little and stitched them together:

DSC05487

9.  Take the backing circle and glue/stitch it in place to neaten up the back.

DSC05489


10.  See which way up you prefer and stitch the Brooch Pin in place.

DSC05490


There you have it!

I really love how it has turned out – now to make another.

DSC05492

“LEST WE FORGET “

Why not whip up some Anzac Biscuits as well – I will be using my Gluten Free recipe to make ours!


Until next time

Nanny xx

Please share:

  • Share on Facebook (Opens in new window) Facebook
  • Email a link to a friend (Opens in new window) Email
  • Share on X (Opens in new window) X
  • Share on Pinterest (Opens in new window) Pinterest

Filed Under: NANNY CHAT, SIMPLE PROJECTS

  • « Previous Page
  • 1
  • 2
  • 3
  • 4
  • 5
  • 6
  • …
  • 18
  • Next Page »

Welcome!

Welcome! I am Nanny and this is where I like to share my crafting as well as other snippets of our life in Australia. Read more

Social

Follow me on:

Like a Newsletter?

My Button4u

grab button for Nannycraft4u
<div class="nannycraft4u-button" style="width: 150px; margin: 0 auto;"> <a href="http://www.nannycraft4u.com.au" rel="nofollow"> <img src="http://i1168.photobucket.com/albums/r482/Nannycraft4u/logo8-001.jpg" alt="Nannycraft4u" width="150" height="150" /> </a> </div>

Looking for something?

Australian Women Bloggers Directory by Blog Chicks

Subscribe to Blog via Email

Enter your email address to subscribe to this blog and receive notifications of new posts by email.

Follow on Facebook

Follow on Facebook

Favourites

  • Curtain Tie Backs
    Curtain Tie Backs
  • Let's Sew 23 - How to make a simple Library Tote
    Let's Sew 23 - How to make a simple Library Tote
  • Make a lined,ruffle top, drawstring bag.
    Make a lined,ruffle top, drawstring bag.
  • Make a 9 patch block for Fire victims
    Make a 9 patch block for Fire victims
[instagram-feed]

Meta

  • Log in
  • Entries feed
  • Comments feed
  • WordPress.org

© Nannycraft4u

All content and images belong to Nannycraft4u unless otherwise indicated. You are welcome to link back to my blog, but you may not copy whole posts, tutorials or photos without my permission. Please give credit for my work and link back to the original post at Nannycraft4u.com If you use one of my ideas, I would love to know about it. Designs and tutorials are for personal use only.

Copyright © 2026 · Lifestyle Pro Theme on Genesis Framework · WordPress · Log in