• HOME
  • ABOUT
  • BLOG
  • CONTACT
  • FEATURES
  • PARTIES I LINK TO

Nannycraft4u

Make your handmade dreams a reality - Just ask Nanny!

  • CHARITY PROJECTS
  • TUTORIALS
    • BAGS,POUCHES,ROLLS,WALLETS
    • EMBROIDERY
    • HOME/DECOR
    • LET’S SEW
    • QUILTING TUTORIALS
    • SPIN THE PINS
    • TOYS
    • WOTZA WEDNESDAY
  • SEWING/QUILTING
    • SIMPLE PROJECTS
    • TIPS & TOOLS
  • RECIPES
  • NANNY CHAT
  • NANNY & POPPY PROJECTS
    • CRAFT ROOM
    • HOUSE
    • TRAVEL
Home » TUTORIALS » LET'S SEW » Page 7

Lets Sew Part 3 – Which foot first?

October 9, 2012 by Nanny Leave a Comment

Put Your Best Foot Forward  – but which one????

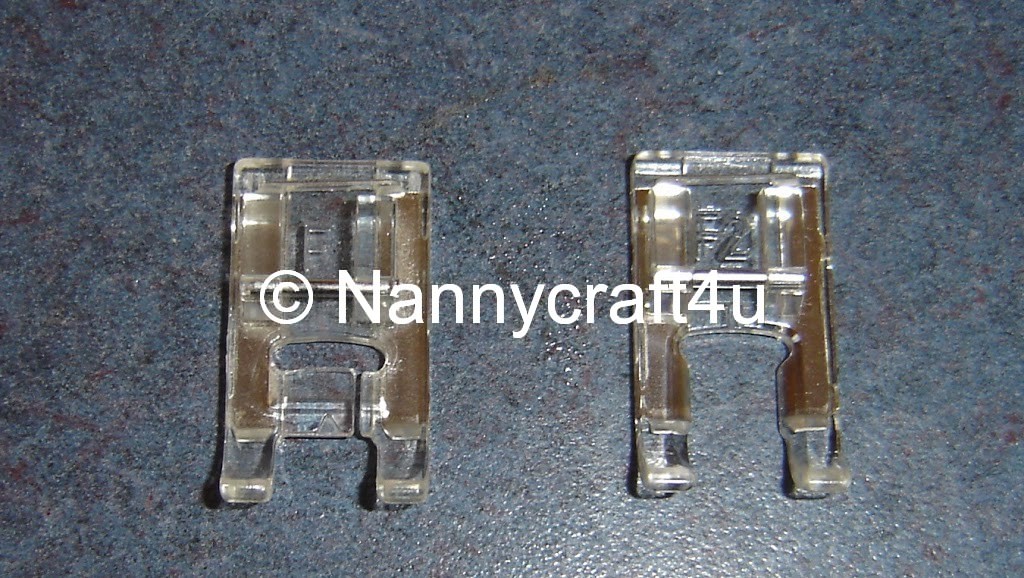
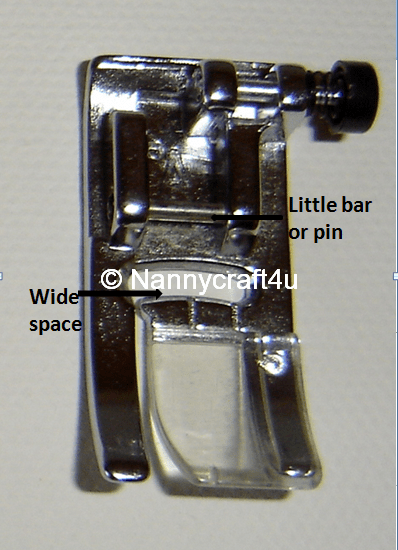
To start our adventure, we are going to use the following foot:

You can see the wide opening that allows us to use straight stitching or zigzag without changing the foot.
If you check your feet, I’m sure you will find one that fits the bill (or should that be the leg??)
Let’s attach our foot now!
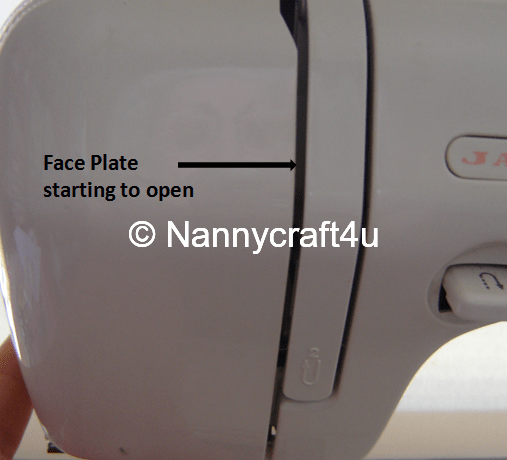
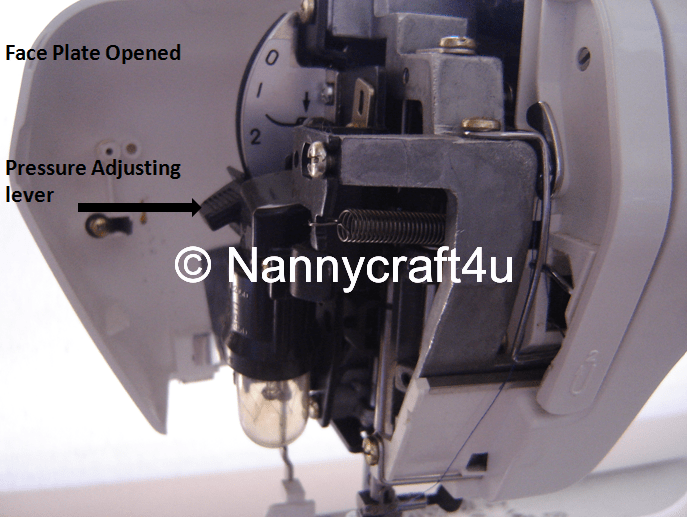
To attach any foot on Betsy, I have to ensure that the Pressure Adjusting Lever is at level 3.  This is found in behind the Face Plate.  This stays set on 3 for regular stitching.

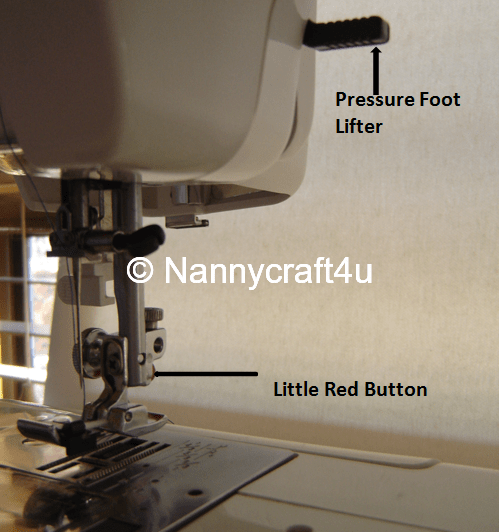
Note the Pressure Foot Lifter – Betsy has hers on the inner side but some machines have it at the back.  This we use to lift the foot so that we can change it over.

I turn the Balance Wheel to raise the needle to its highest position.

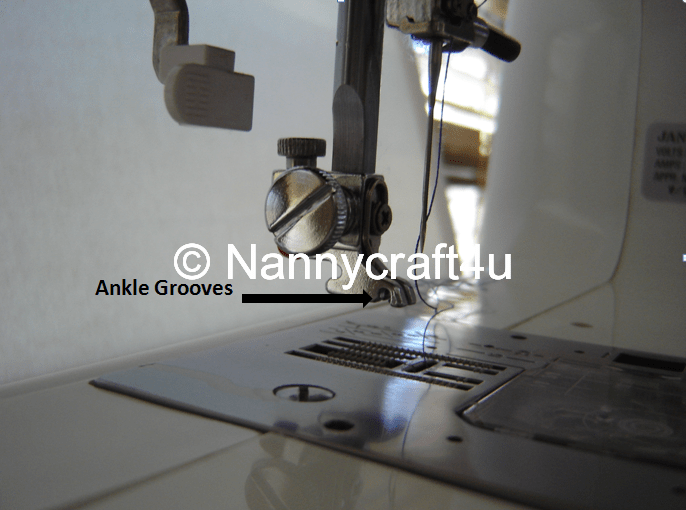
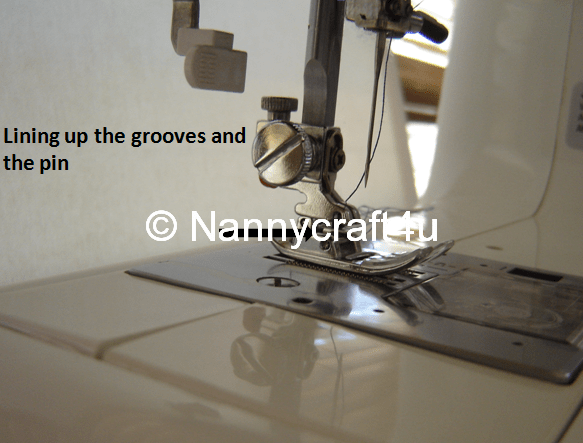
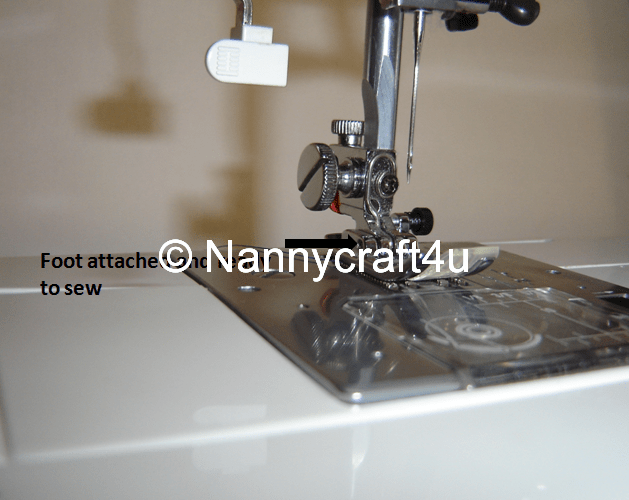
Betsy has a red button round back and when this is pressed, the foot falls off.  I then take the  foot that I’m going to use and sit it under the ankle grooves.
(I’m not kidding it really is called the ankle!! – where else would you join a foot??!)
The ankle grooves sit on the little bar and click into place when you lower the Pressure Foot Lifter .  Notice I said lower the Pressure Foot Lifter – don’t let it clunk into place – be gentle!!

Just before I go, I realised that I forgot to introduce you to the Mother Machine -‘ Biddy’!  This was a 21st birthday present to Mum from Dad and yes, even though mum has a lovely name – Carmel Josephine – she has always been known as Bid!
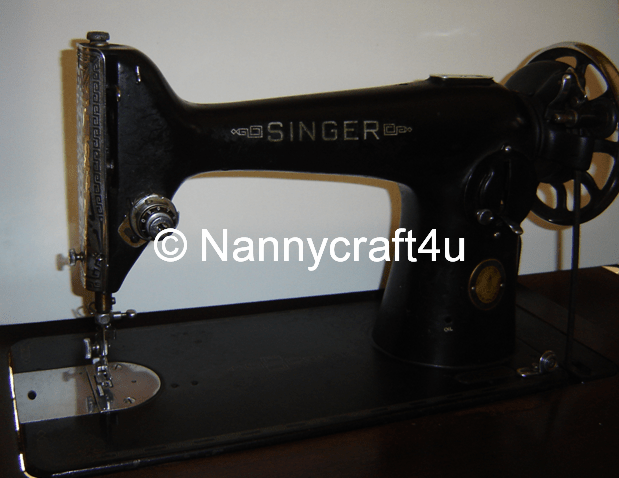
So if you are sewing on a ‘Biddy’ you will have a foot that looks like this:
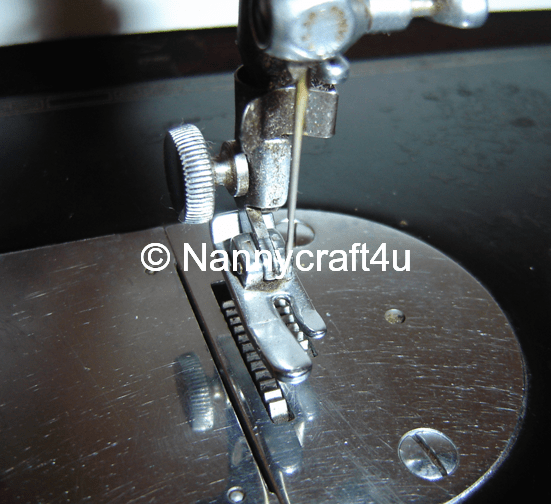
and it will do the job of straight sewing just as well as the newer one on Betsy!!
Until next time
Nanny 🙂

Please share:

  • Share on Facebook (Opens in new window) Facebook
  • Email a link to a friend (Opens in new window) Email
  • Share on X (Opens in new window) X
  • Share on Pinterest (Opens in new window) Pinterest

Filed Under: LET'S SEW, SEWING/QUILTING, TIPS/TOOLS, TUTORIALS

Let’s Sew Part 2 – Threading Your Machine

October 9, 2012 by Nanny Leave a Comment

Good morning!
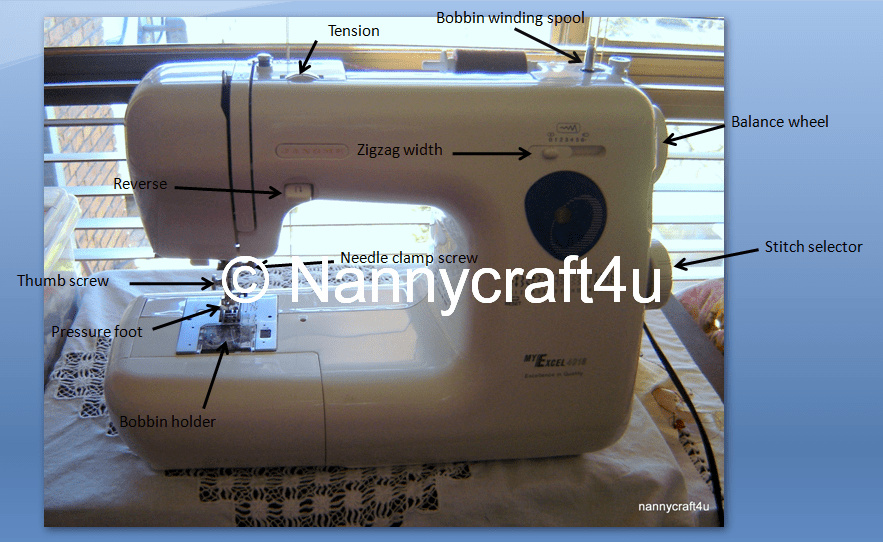
I promised you an introduction to my Betsy so here she is:

  
I have taken a photo of Betsy to help me show you some of the most obvious bits and pieces of her anatomy –  like Nanny, Betsy is really old  getting on in years, but can still mix it with the younger ones.  J
Together, we have sewn everything including clothes, quilts, curtains, bags, toys and have spent many happy hours together.
Now I know you have been reading your manuals, so even if you have a different machine, you should be able to find the same sort of thing on yours too!
To prepare for sewing, we need to wind a bobbin and thread the machine – most machines have easy to follow directions for both of these jobs so here are a couple of tips:
If you look closely at your bobbin, you will notice a little hole on each side.  Take the thread and feed through the hole from the inside of the bobbin out.  Then, holding that, wind the thread around the bobbin a few times.
Now put the bobbin onto the bobbin spool, and following your manual instructions, wind your bobbin.  When the bobbin is full, remove it and snip that thread through the hole off as close to the bobbin as you can.  Your bobbin is now ready to put into the bobbin holder.

To thread your machine start by putting the spool onto its holder. 
Tip:  If your spool is lying down like the one on Betsy, put it so that the thread pulls away from the grooved end of the spool – this will stop the thread catching and jamming.

Now we need to lift the bobbin thread.  Holding the needle thread in your left hand, wind the balance wheel slowly towards you until the needle goes down and back up.  There you will see a loop over the thread you are holding – that is the bobbin thread- so pull the loop until you get the end out, then take both the needle and bobbin threads under the presser foot and towards the back.

Practise threading your machine so that you are able to easily do all of these steps and next time we will look at the stitches and do some sewing!
Until next time
Nanny  🙂

Please share:

  • Share on Facebook (Opens in new window) Facebook
  • Email a link to a friend (Opens in new window) Email
  • Share on X (Opens in new window) X
  • Share on Pinterest (Opens in new window) Pinterest

Filed Under: LET'S SEW, SEWING/QUILTING, TIPS/TOOLS, TUTORIALS

Let’s Sew Introduction

October 9, 2012 by Nanny 2 Comments


Good Afternoon!
I hope the sun is shining in your part of the world. As you would have seen in a previous post, I am Nanny  and will be bringing you Let’s Sew . I have 6 beautiful grand children who very quickly learned to “Just ask Nanny” and they prompted me to start my page, Nannycraft4u where I get to share my love of all things crafty.

Today I thought we could start our series of Let’s Sew chats  J
Getting To Know Your Machine

The first thing you need as a beginner is to understand your machine – have you given her a name yet?

I have two – ‘Betsy’ and ‘Flo’ – and we have a loving, supportive relationship!
Like any relationship, your relationship with your machine will get stronger if you make an effort to ‘know’ her so you need to get out your manual (I know – you don’t like reading and you want to get sewing and the kids won’t let you and it’s Wednesday and it’s cold and ….), get a cuppa and read about her!!!!  (You have to trust Nanny on this one!!)

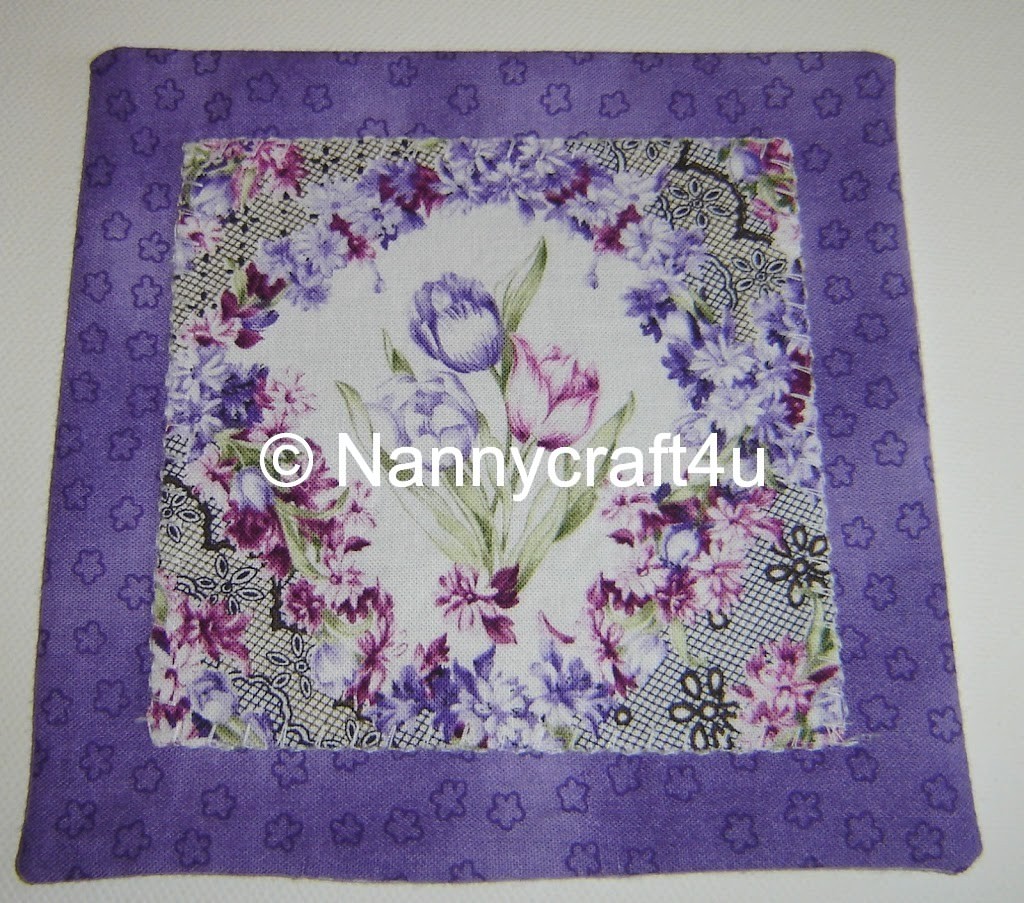
Speaking of a cuppa – I made this for you today!  It’s a mugmat and everyone needs one of these – do you have one?  Don’t worry if you don’t because I will be showing you how to make one as soon as we get underway with our sewing.

 
So here’s the deal – you have a study of the manual – don’t worry there won’t be a test – and next time, we will take a look at Betsy and learn how to make her go!
In the meantime, make sure you give your machine a name…….please share your names with me and tell me if there is anything in particular you would like me to include so I can put it on the list. (I don’t want to be chatting to myself!!!)
Until next time
Nanny xx


Please share:

  • Share on Facebook (Opens in new window) Facebook
  • Email a link to a friend (Opens in new window) Email
  • Share on X (Opens in new window) X
  • Share on Pinterest (Opens in new window) Pinterest

Filed Under: LET'S SEW, TUTORIALS

Let’s Sew – Sewing Room Project 2

October 5, 2012 by Nanny 4 Comments

Good morning!!
I hope you are ready and waiting for our next project – a pin cushion.

It’s amazing how many pin cushions you collect over the years and I have had fun checking mine and my sewing friend’s collections to decide on what we will make.  I asked the question “What makes a good pin cushion?” The first thing we need to consider is what you will use it for – duh Nanny it’s a pin cushion!! – then how big?, what shape? (I just can’t bring myself to stick pins into an animal or bird!!) where will it go? wrist, finger, machine, table etc

I have to remind myself that this is a beginner project and so I will stick to the basics – I’m sure you will have fun making some of the decorative ones you will see as you go along on your sewing journey..  We may even get to try some of those together at a later date!!
Let’s get started.
You will need:  
2 of your fabrics
1 feature fabric  (can be any scrap or another of your fabrics)
Iron on Vliesofix
From your fabrics cut 2 x 6″ squares
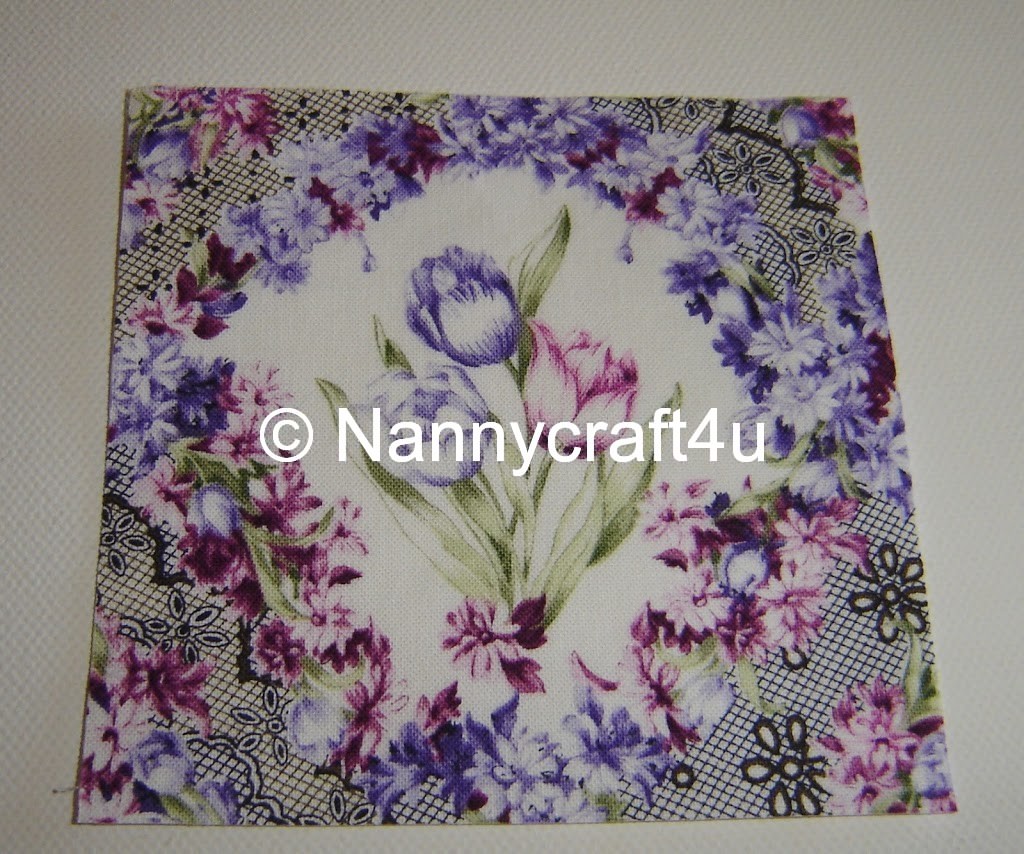
Choose a feature piece (can be any scrap or another of your fabrics)  It has to be larger than 4″ x 4″
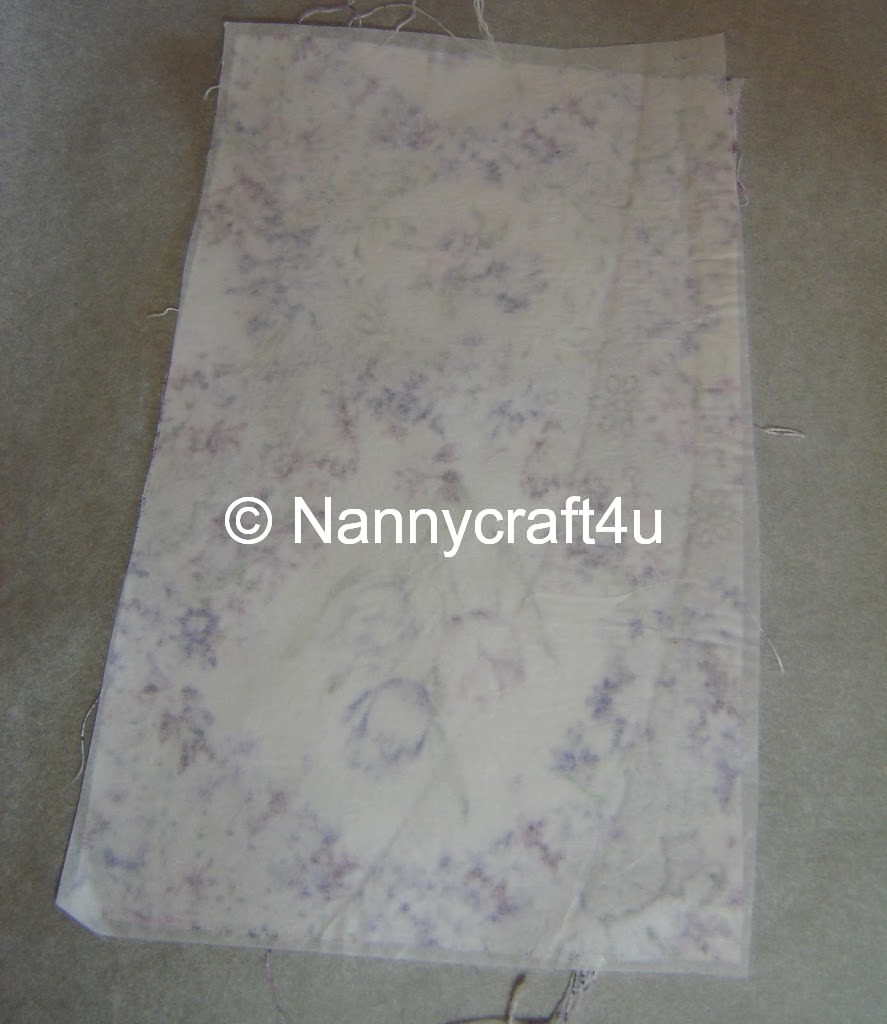
Cut a piece of the Vliesofix about the size of the feature.
Place a piece of baking paper down on your ironing board and the the feature piece face down.  Then put the Vliesofix rough side down onto the back of the feature piece.
Press.
Now trim your feature piece to 4″ x 4″

TIP:  Keep your Vliesofix in a zip lock bag – it doesn’t like humidity and will separate!!

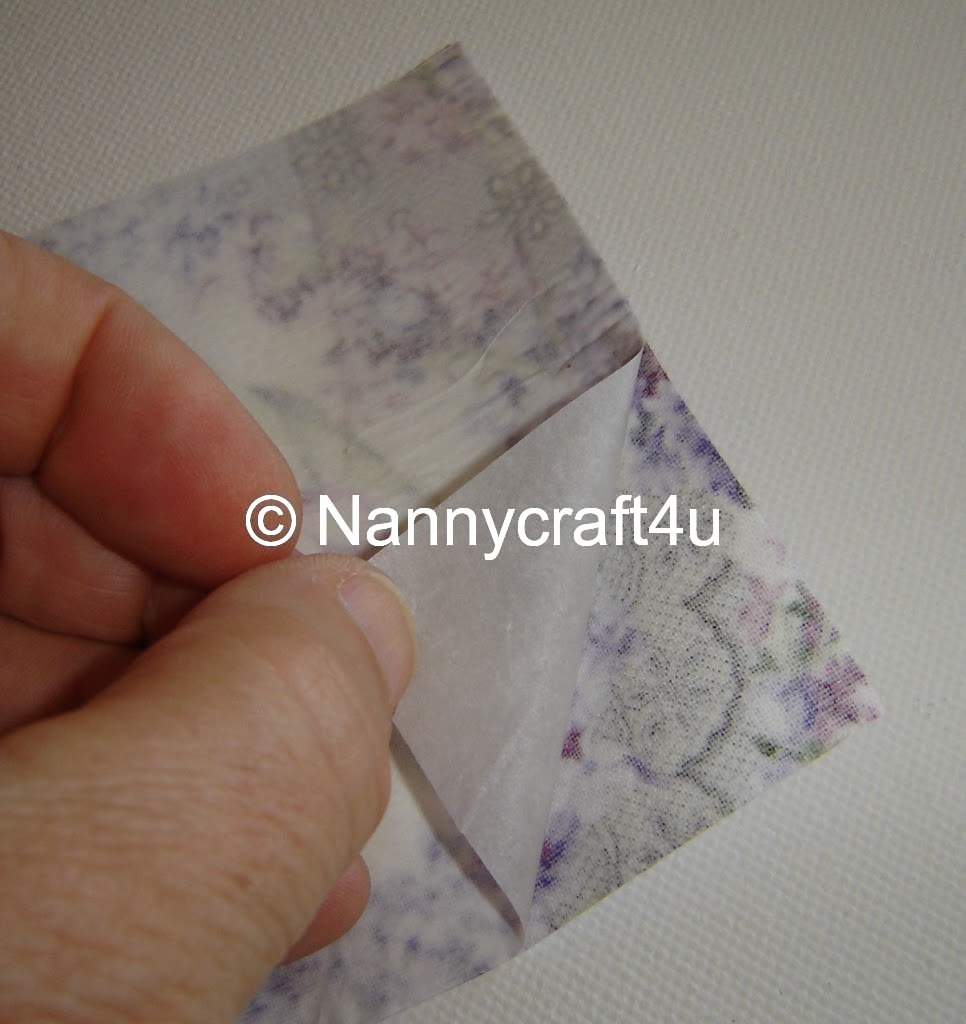
Peel the backing paper from the feature square.

Centre the feature square on one of your other squares and press.

Prepare our Machine:  Today I am going to use a different foot – the Satin Stitch Foot which is used for decorative stitching and satin stitch OR the Craft Foot which is the open toed satin stitch foot used for applique.
Check your manual to see if you have one of these – if not just use your All Purpose foot!

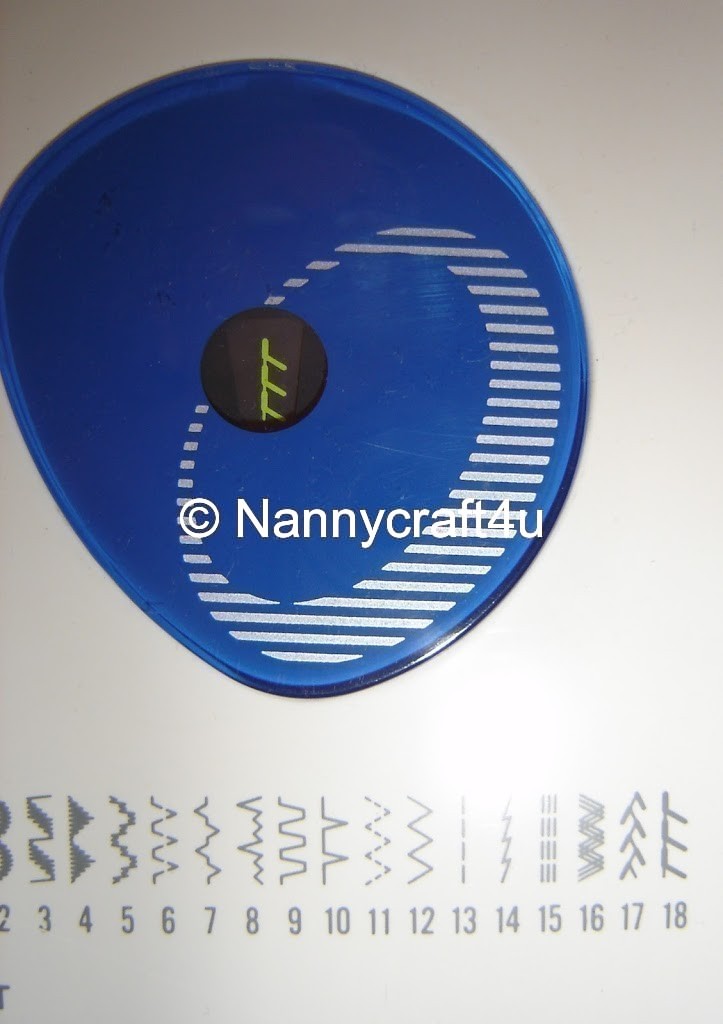
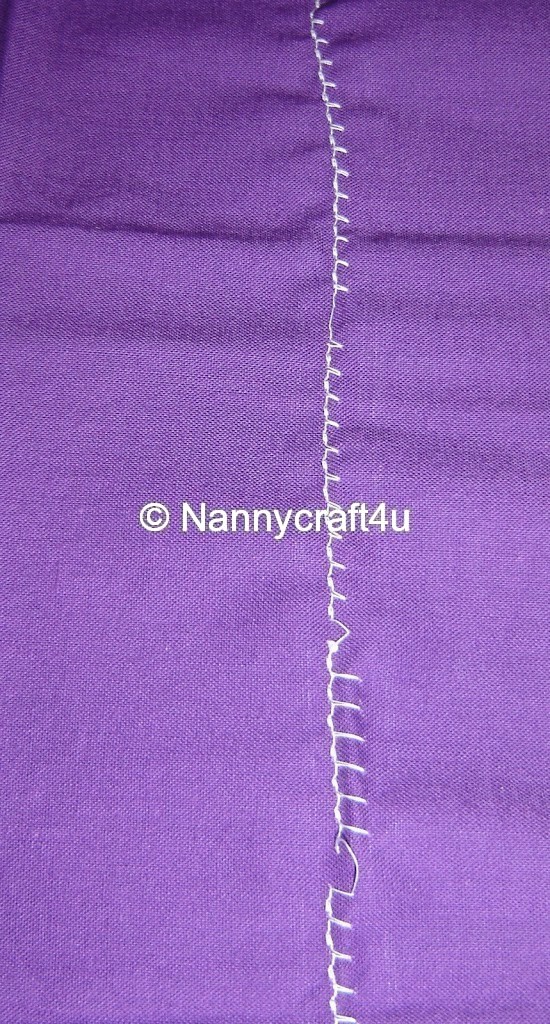
I am going to use a different stitch also – on Betsy it is number 18 and is called the Overedge Stitch. Try to find this stitch or one similar – if you don’t have one you can use a zigzag.
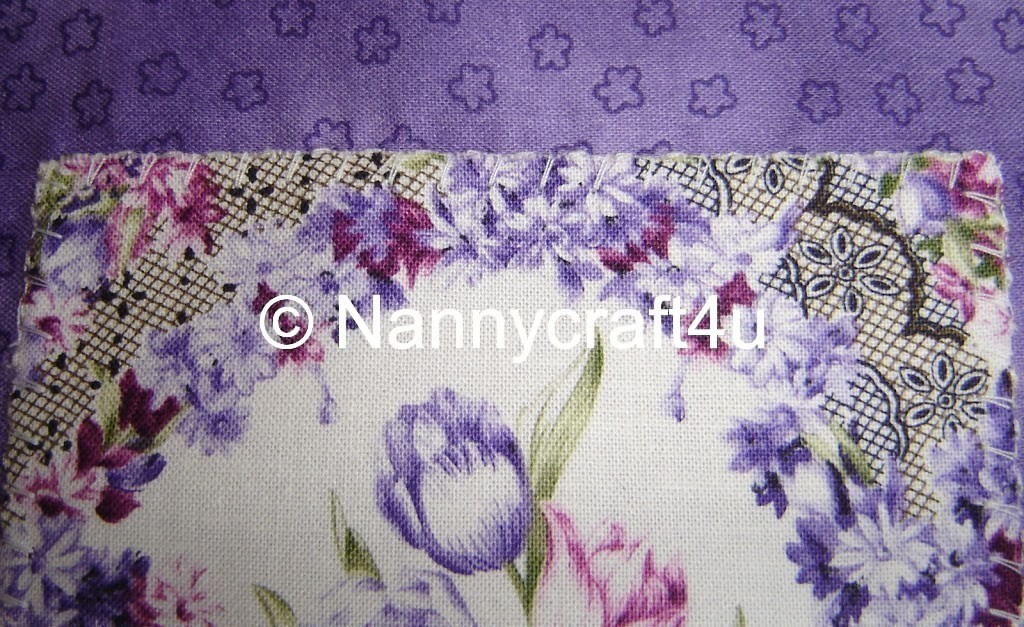
This stitch is used to finish off seams but today we are going to use it to applique!
Take a scrap of fabric and try the stitch – change the length and width until you are happy with it.

Sew around the Feature square noting the side that the stitch extends to – we want those extending stitches to go onto the feature while the straight stitch goes along the edge.
It’s not quite the same as a hand stitched edge – if you are interested I could show you how to handstitch at a later time!

Take this square and your other square and with right sides together, sew around the outside (like we did in project 1), clip corners and turn right side out.  (Don’t forget to leave an opening to turn through!!)


Roll between your thumbs and fingers and then press.
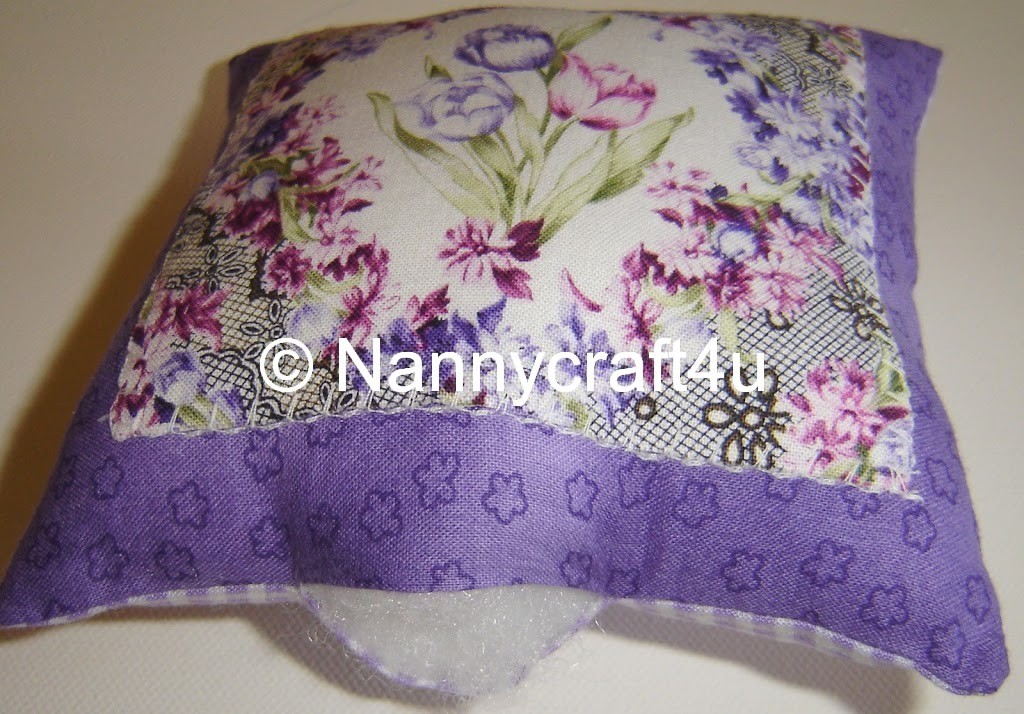
Stuff the pincushion, pushing well into the corners.  It will need to be packed tightly.
We are going to close the seam using Ladder Stitch – think a ladder and lots of rungs!
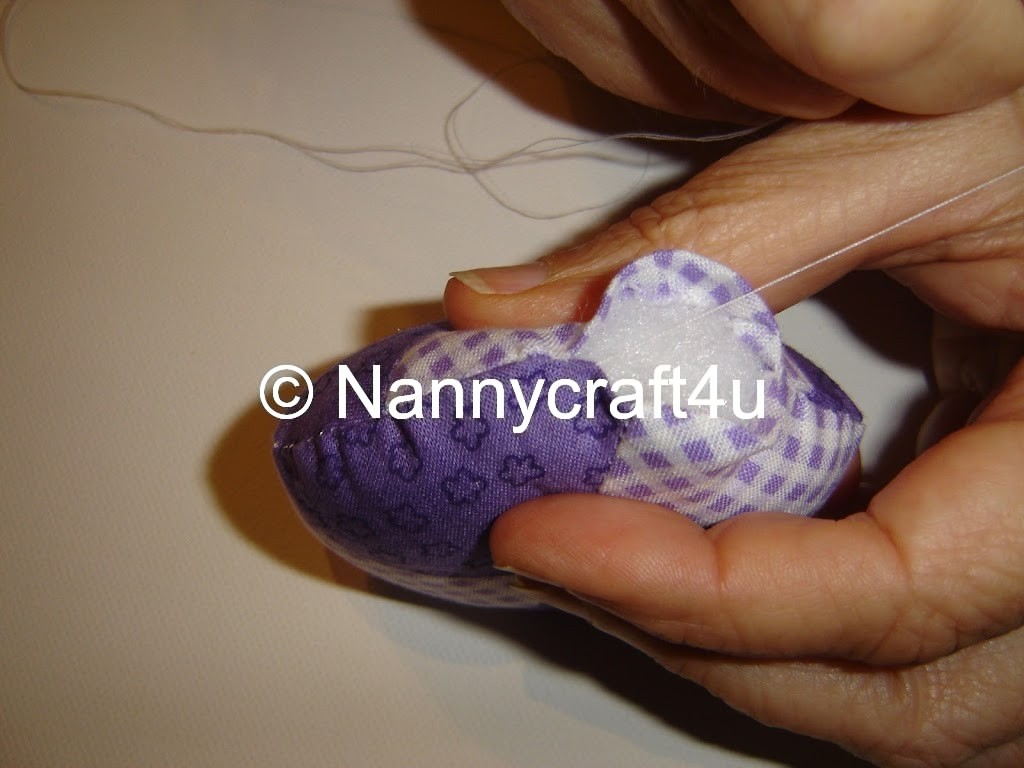
Take a needle and a knotted thread and slide the needle through the seam allowance at the beginning of the opening.
Slide the needle along inside the seam allowance on one side to form a stitch
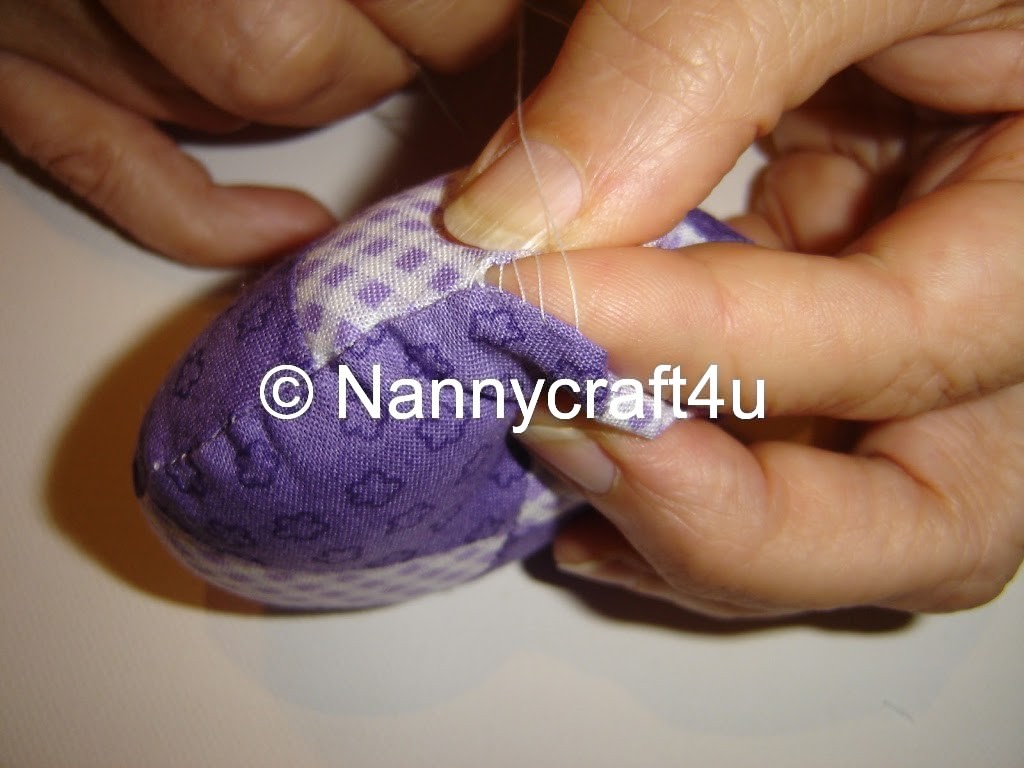
Then insert the needle in the other side, directly opposite the point the needle came out, and take another stitch. Repeat this for 4-5 stitches – see on my finger
Then pull the thread to close the stitches.  Continue with this till the seam is closed. Finish with a double stitch and push your needle out through the pin cushion – trim.
You will have a lovely, neat finish  – ideal for using when making softies!!
Now go and put your pins in your new pin cushion!!
Until next time
Nanny  🙂

Please share:

  • Share on Facebook (Opens in new window) Facebook
  • Email a link to a friend (Opens in new window) Email
  • Share on X (Opens in new window) X
  • Share on Pinterest (Opens in new window) Pinterest

Filed Under: LET'S SEW, SEWING/QUILTING, SIMPLE PROJECTS, TUTORIALS Tagged With: beginner sewing, Pin Cushion

  • « Previous Page
  • 1
  • …
  • 5
  • 6
  • 7

Welcome!

Welcome! I am Nanny and this is where I like to share my crafting as well as other snippets of our life in Australia. Read more

Social

Follow me on:

Like a Newsletter?

My Button4u

grab button for Nannycraft4u
<div class="nannycraft4u-button" style="width: 150px; margin: 0 auto;"> <a href="http://www.nannycraft4u.com.au" rel="nofollow"> <img src="http://i1168.photobucket.com/albums/r482/Nannycraft4u/logo8-001.jpg" alt="Nannycraft4u" width="150" height="150" /> </a> </div>

Looking for something?

Australian Women Bloggers Directory by Blog Chicks

Subscribe to Blog via Email

Enter your email address to subscribe to this blog and receive notifications of new posts by email.

Follow on Facebook

Follow on Facebook

Favourites

  • Curtain Tie Backs
    Curtain Tie Backs
  • Let's Sew 23 - How to make a simple Library Tote
    Let's Sew 23 - How to make a simple Library Tote
  • Make a lined,ruffle top, drawstring bag.
    Make a lined,ruffle top, drawstring bag.
  • Make a 9 patch block for Fire victims
    Make a 9 patch block for Fire victims
[instagram-feed]

Meta

  • Log in
  • Entries feed
  • Comments feed
  • WordPress.org

© Nannycraft4u

All content and images belong to Nannycraft4u unless otherwise indicated. You are welcome to link back to my blog, but you may not copy whole posts, tutorials or photos without my permission. Please give credit for my work and link back to the original post at Nannycraft4u.com If you use one of my ideas, I would love to know about it. Designs and tutorials are for personal use only.

Copyright © 2026 · Lifestyle Pro Theme on Genesis Framework · WordPress · Log in