• HOME
  • ABOUT
  • BLOG
  • CONTACT
  • FEATURES
  • PARTIES I LINK TO

Nannycraft4u

Make your handmade dreams a reality - Just ask Nanny!

  • CHARITY PROJECTS
  • TUTORIALS
    • BAGS,POUCHES,ROLLS,WALLETS
    • EMBROIDERY
    • HOME/DECOR
    • LET’S SEW
    • QUILTING TUTORIALS
    • SPIN THE PINS
    • TOYS
    • WOTZA WEDNESDAY
  • SEWING/QUILTING
    • SIMPLE PROJECTS
    • TIPS & TOOLS
  • RECIPES
  • NANNY CHAT
  • NANNY & POPPY PROJECTS
    • CRAFT ROOM
    • HOUSE
    • TRAVEL
Home » SEWING/QUILTING » Page 16

Needled!!

October 13, 2012 by Nanny 4 Comments

Hi everyone!

When I go travelling in the Motorhome, I like to take my craft with me.  How to carry my knitting needles?  At home they stand up in a cardboard tube but that wouldn’t work in the confined space so Nanny had to get thinking!!

I had a set of placemats so I took one and with some thought, fashioned a knitting needle roll!

The flap at the top folds over the needles so that they cannot fall out and then it rolls up and ties!
A crafty friend saw said roll and commented “Yes, you can make me one of those please!”
As I am catching up with this friend tomorrow, I thought it time I got busy and that I would share the making with you:
You need:
A placemat
A fat 1/4 of coordinating fabric
Something to act as lining – I used calico because that’s what I could find!!
In between the taking of this photo and the next stage, the fabric changed – not sure how or why, but I guess the universe knew something I didn’t!! lol
So, measure the length of your placemat – mine was 19″ – add 1/2″ and cut a rectangle 191/2″ x 11″.  Cut a piece of calico or lining the same size.  With right sides together, sew around the outside leaving a gap to turn it through.  Snip corners and turn right side out.
Roll seams between your thumbs and fingers and then press.  Then topstitch about 1’4″ from the edge along the long side opposite your opening. This will be the top of the holder, where you insert the needles.

You then position the rectangle on the placemat and using a walking foot (if you have one) sew around the other three sides ie the sides and the bottom.
It now has to be divided up into slots for the needles.  I did 7 at 5/8″, 13 at 9/8″ and then divided the remainder in half to make two larger slots.  I used the walking foot and sewed from the bottom up.
Now take the remainder of the fabric fat 1/4 and cut a strip about 8″ wide (this will be determined by your piece of fabric) and a strip about 1 3/4″ wide for the tie.
Fold the 8″ piece in half with right sides together and press.  Then stitch around edge leaving gap for turning right side out.  Clip corners, turn right side out, roll between thumbs and fingers and press.  Topstitch around the 3 sides as far from the edge as you are comfortable – mine is about1/8″.
Take the tie strip and fold it in half, stitch, clip and turn through.  Close end and stitch (I do this by hand but you can use the machine)
Take the flap piece and fold it in half  and mark with a pin – do the same with the placemat.  Position the flap along the top of the placemat matching the pins and stitch about 1’4″ from the edge.
Take the tie and stitch it to the centre on the placemat side – I didn’t stitch it in the centre but rather about 2/3 of the way along its length. (This will make it easier to tie)
Now all it needs is some knitting needles – roll it up and tie and it is ready to go!
I am really happy with this and I am sure you will be too!!  Maybe you know a knitter – it would make a great gift!!
I hope my friend thinks so anyway!!
Until next time
Nanny xx

Please share:

  • Share on Facebook (Opens in new window) Facebook
  • Email a link to a friend (Opens in new window) Email
  • Share on X (Opens in new window) X
  • Share on Pinterest (Opens in new window) Pinterest

Filed Under: BAGS,POUCHES,ROLLS,WALLETS, SEWING/QUILTING, SIMPLE PROJECTS, TUTORIALS

Oh Christmas tree!

October 12, 2012 by Nanny 2 Comments

Hi everyone!

Well it is still October but Christmas is all around us already!!  I have just been visiting Grand children and whilst there I spotted this little number that our grand daughter had made at school last year – so out came the camera so that Nanny could share – I thought it would make a great little pressie!!

What you need:

green felt (this is quite thick – not the sheet felt from SL)

bag of sparkly pom poms and any other decoration you can find

a decorative pen/pencil (or you could decorate your own)

Small bells

glue

Cut out a tree shape x 2.  Sandwich the pen/pencil between the trees and glue.  Decorate .  Sew on the bells.

Jingle while you work!!!  Isn’t that cute!!

(Thanks to the unknown teacher!!!)

Have you started preparing for Christmas?  Do you have any quick, easy ideas to share?

Until next time
Nanny xx

Please share:

  • Share on Facebook (Opens in new window) Facebook
  • Email a link to a friend (Opens in new window) Email
  • Share on X (Opens in new window) X
  • Share on Pinterest (Opens in new window) Pinterest

Filed Under: NANNY CHAT, SIMPLE PROJECTS

KCWC – meeting the challenge

October 11, 2012 by Nanny Leave a Comment

Hi everyone!

After a veeeerry slow start this morning, Nanny got a -sewing and, determined to meet my committment for the Kids Clothes Week Challenge, and taking the advice given by Katherine, I started with  the Oliver + S Bucket Hat :

So here it is on the outside –

and on the reverse

and this one just to show you how Nanny took the photos without a ‘head’!!

I am loving being a part of both Blogtoberfest  and Kids Clothes Week Challenge
Isn’t it funny how you will do something for someone else …. it’s easier than having to tell  that you ‘just didn’t get around to it’  You know – when it’s the last thing you feel like doing, it still feels easier than reporting to the blogosphere that you didn’t meet the challenge!!
Does any one else feel that way or is it just me?  Do you find yourself madly trying to get the task done?  Oh well, as long as we are enjoying what we are doing it doesn’t really matter what our ‘motivation’ is …… or does it??
Until next time
Nanny xx

Please share:

  • Share on Facebook (Opens in new window) Facebook
  • Email a link to a friend (Opens in new window) Email
  • Share on X (Opens in new window) X
  • Share on Pinterest (Opens in new window) Pinterest

Filed Under: SEWING/QUILTING

Lets Sew Part 7 – Sewing Room Project 1

October 9, 2012 by Nanny 1 Comment


Today we will be making the first of our projects – a small storage container – practising the skills of:

  Straight Stitching
Stitching around corners
Clipping corners
Turning through with pointed corners
Top Stitching

I made one of these at my quilting group and thought it suited our needs here perfectly!! 
(Apologies:- I tried to find someone to thank for the creative idea but didn’t have any luck!)

So Let’s Sew!!

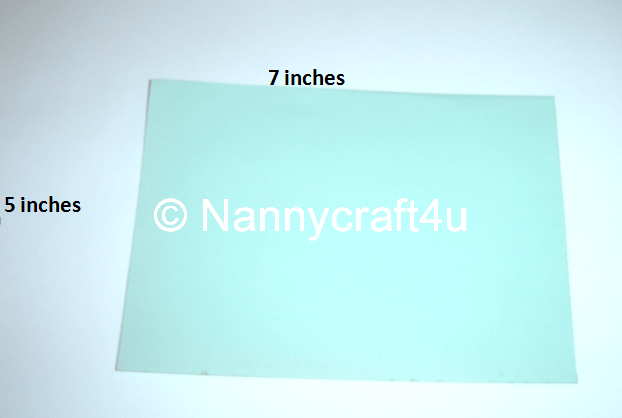
From your fabrics, select 2.  We are going to cut a rectangle from each – 7″ x 5″ – I selected a dark and a light from the lovely selection that Louise sent me – thanks Louise!!

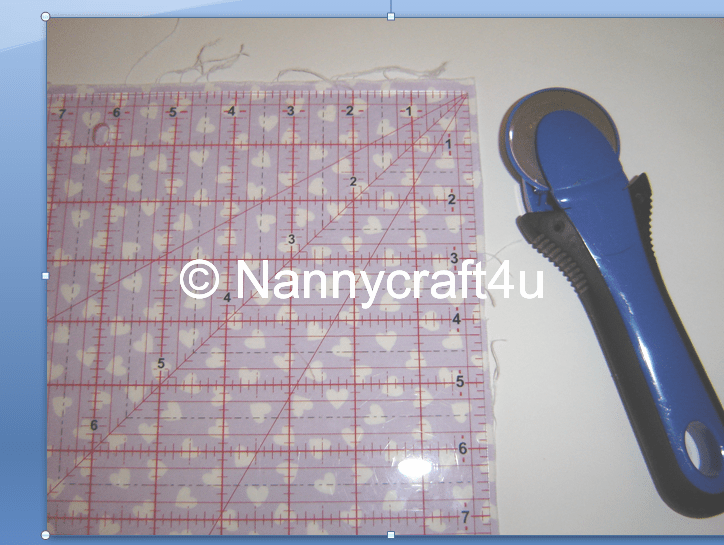
If you have a rotary cutter and cutting mat, you will use your rule to measure and cut the rectangles.

Gemma has given some great tips for using your rotary cutter here 

If you don’t have a rotary cutter, TOMG has a great starter pack available  see here and don’t forget that lay-by is available for all orders over $50.00 (great Xmas pressie!! )

Now don’t worry if you don’t have a rotary cutter as you can certainly manage without one – it just takes a little more time!

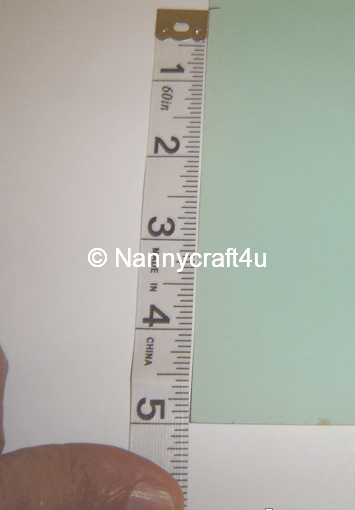
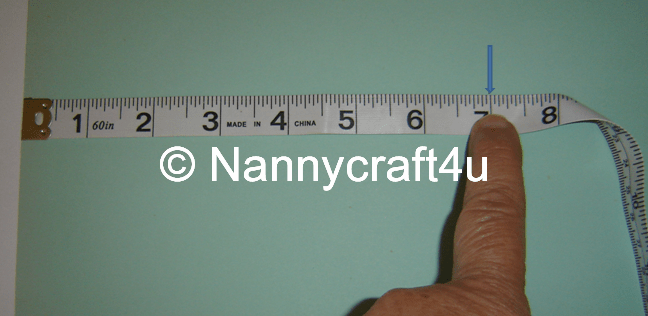
Take a sheet of paper and measure 7″ along from one corner and mark.


Then measure from the corner along the other side  5″ and mark.


Now move your tape up to the 5″ mark and measure across 7″ and mark – check that it measures 5″ from that mark straight down to the 7″ mark on the edge (mine was spot on!)  If not just adjust.
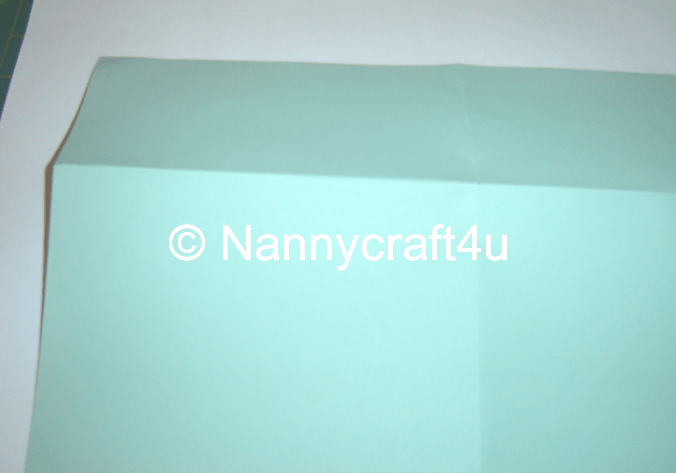
 I then folded to join the dots
and cut along the folds to get my 7″ x 5″ rectangle
I can now use my ‘pattern’ to cut a rectangle from each of the fabrics. (note that you cut the piece from an edge not the centre of your fat 1/4 )

Now it’s time to sew. 

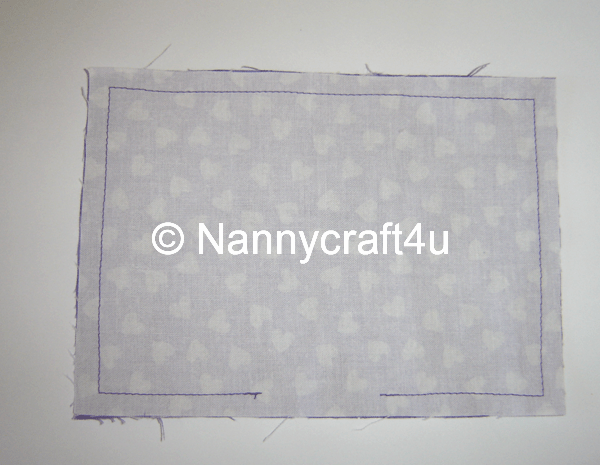
With right sides together and starting about 3″ from a corner (don’t forget to reverse), sew around the outside, taking care to turn sharply at the corners (remember to leave your needle down, lift the Pressure Foot and turn your fabric, lower the Pressure Foot) and stopping about 2.5″ from where you started with a couple of reverse stitches.


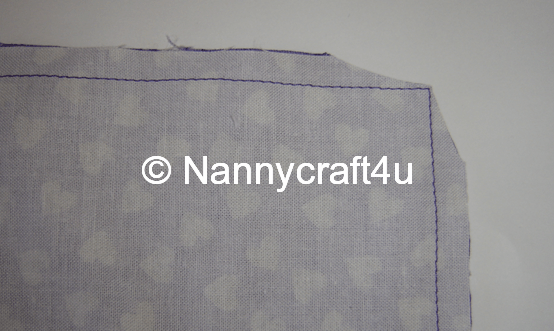
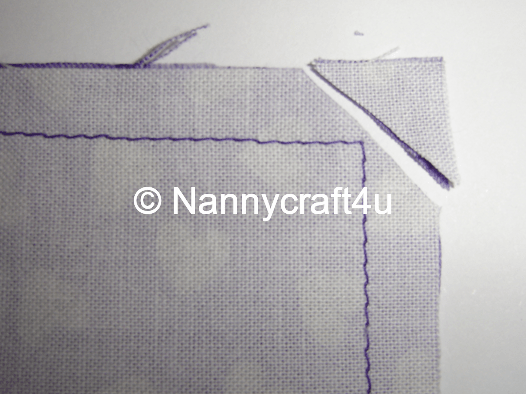
Press and clip the corners


I am going to trim closer by curving slightly – take care not to cut the stitching.  If you do, just go and restitch it in a little further.

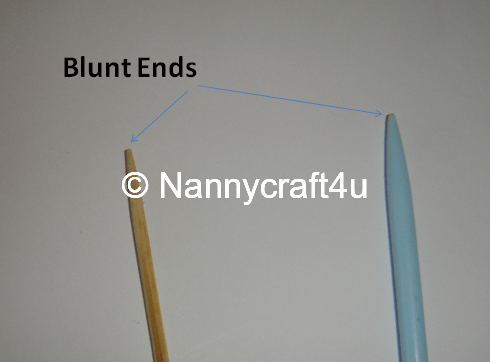
Turn to the right side and gently ease the corners out.  You can use any item as your tool – some use a chop stick – I have a wooden skewer that I have filed the sharp point off and a knitting needle!
Don’t push too hard or you might push right through the corner!!

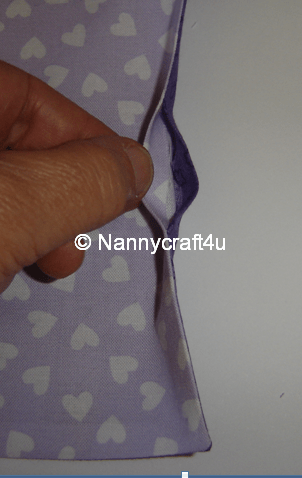
Roll between your thumb and fingers and press remembering to press the seams in where you left the opening.


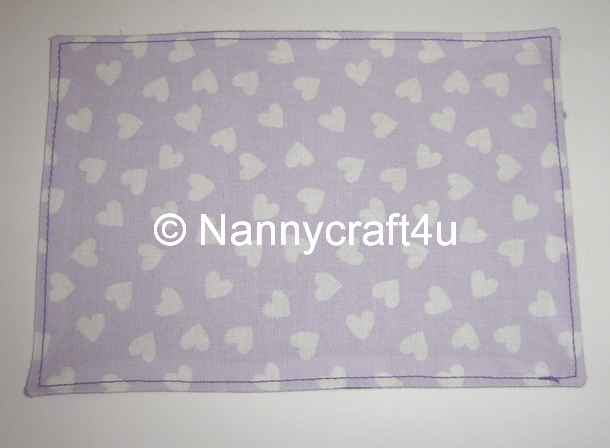
Topstitch all the way around the edge about 1/8″ from the edge – just find a spot on your foot and watch the fabric there – not the needle or use your Stitch in the Ditch foot  (this will close the opening!)

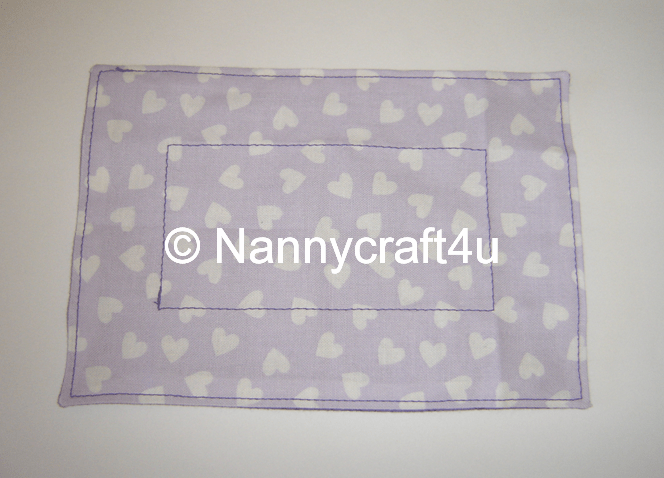
Cut out a piece of paper 3.5″”x1.5″ and centre this on the mat – trace the rectangle and then stitch.


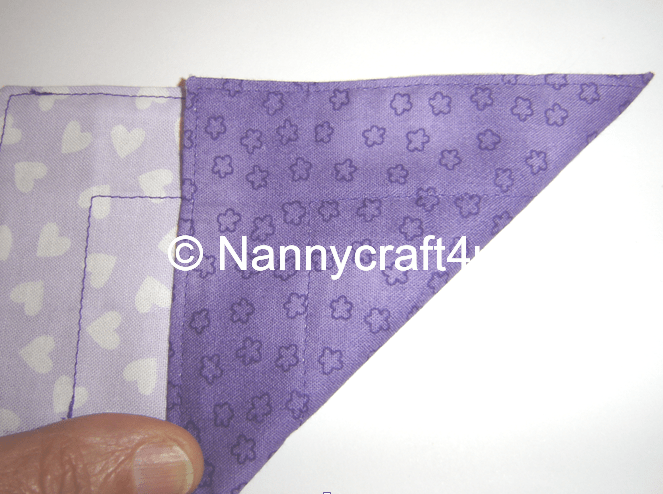
Decide which fabric you want on the outside – I am having the dark –  and then fold from a corner so the adjoining sides are level.

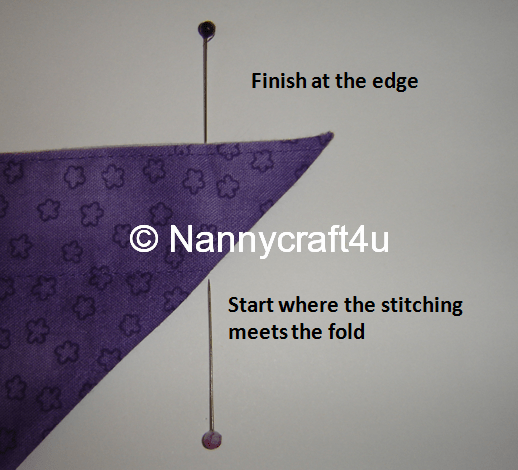
You are now going to stitch from the corner of the sewn inner rectangle at a right-angle to the sides.  Do this for each corner.

Press along the stitching of the rectangle to form the base.

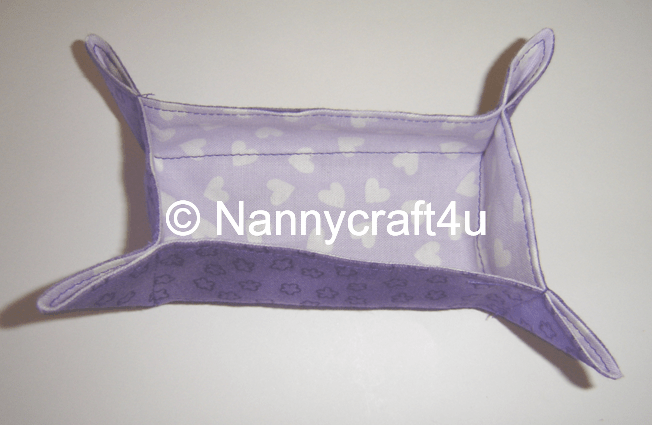
Then we simply turn the corners out to form the trim. 

Taa Daa!!   You now have a sweet little container – I use mine to hold business cards!! 

You can simply make this any size to suit your storage needs, noting that it will need some pellon if you go larger, for support.  I hope you enjoyed making it!!!

What do you think you will use it for?  
I would love to see your photos!!

Until next time
Nanny  xx
Please share:

  • Share on Facebook (Opens in new window) Facebook
  • Email a link to a friend (Opens in new window) Email
  • Share on X (Opens in new window) X
  • Share on Pinterest (Opens in new window) Pinterest

Filed Under: LET'S SEW, SEWING/QUILTING, SIMPLE PROJECTS, TUTORIALS

Let’s Sew Part 6 – Top stitching

October 9, 2012 by Nanny Leave a Comment

Good morning!  
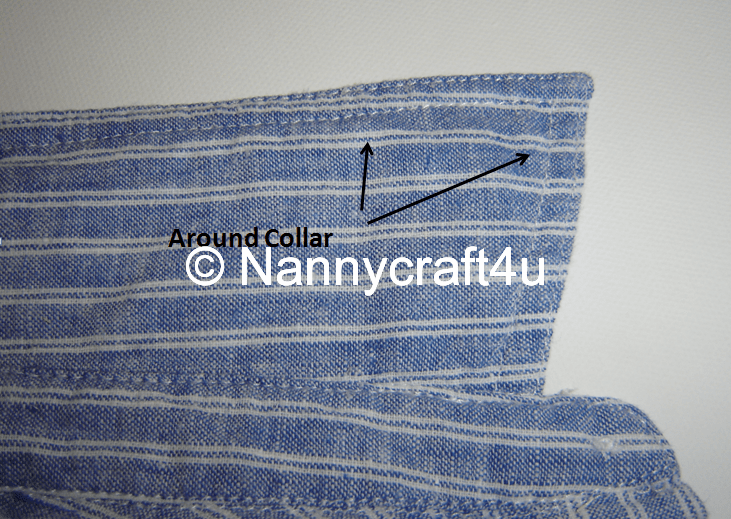
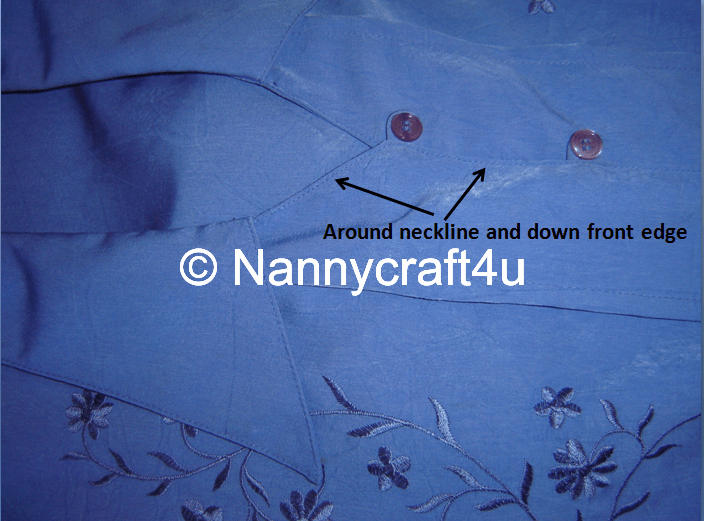
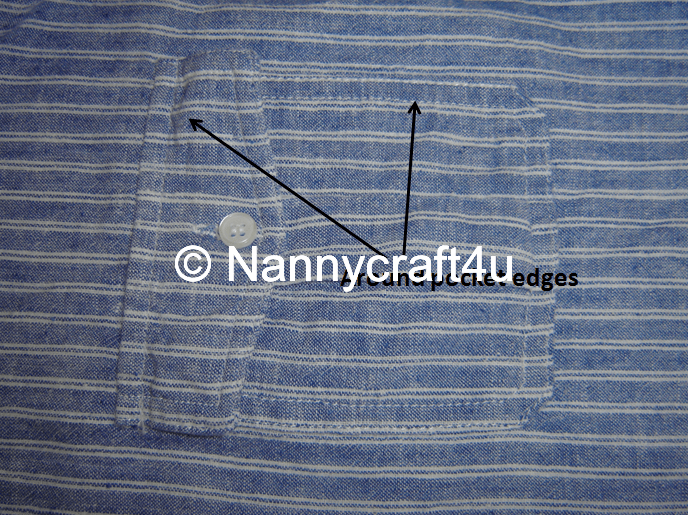
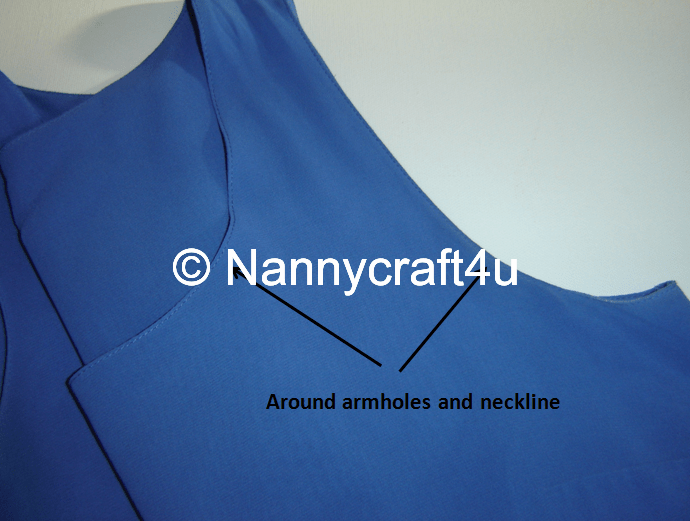
Often when we are sewing, we need to do some top-stitching.  I gathered some examples  (these are all store made):


These are the main areas that you would see topstitching used in clothing, but it is also used extensively in bags, journal covers, soft books etc.

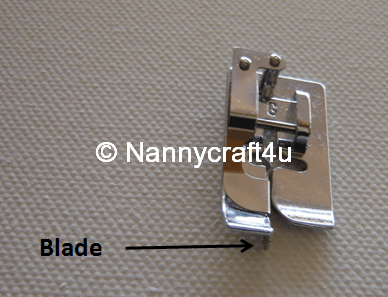
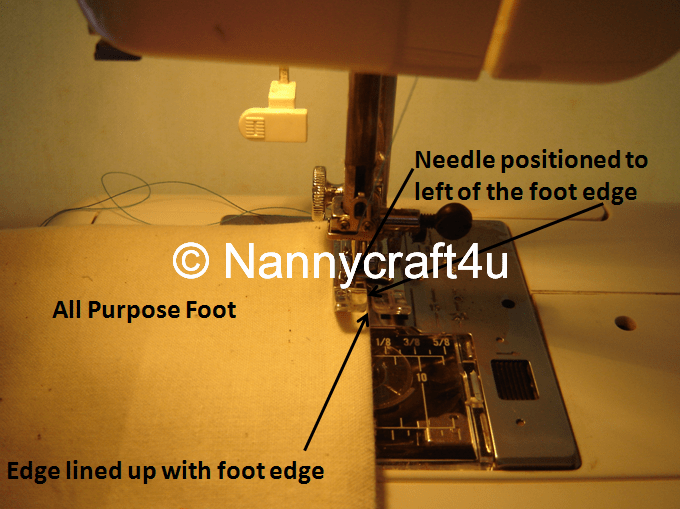
You can use the All Purpose Pressure Foot (reminder here) or you might like to try the ‘Stitch in the Ditch’ Foot.

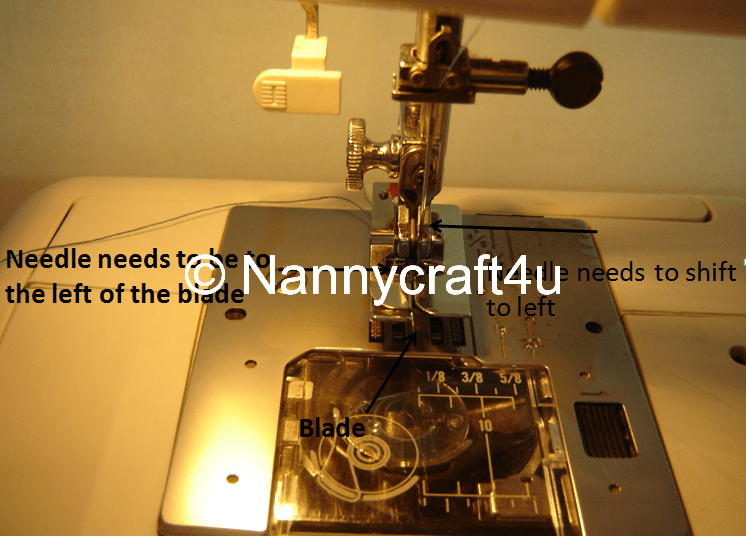
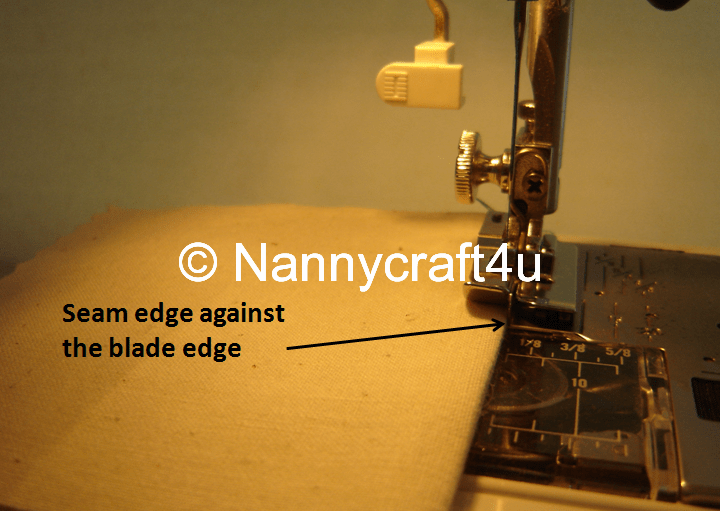
The ‘Stitch in the Ditch’ foot has a little blade that makes it very easy for it to glide along the edge and hence keep your top stitching at an even distance from that edge.
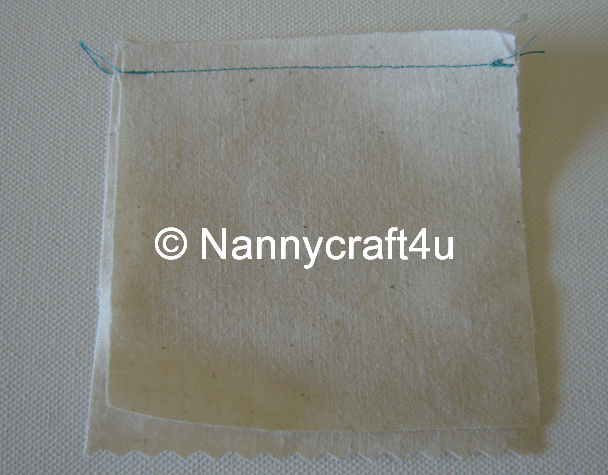
Let’s sew two pieces together to make a seam and then we will top stitch it.

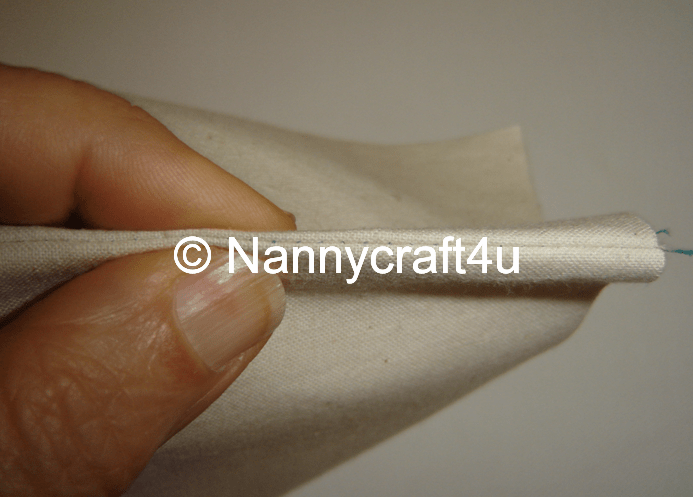
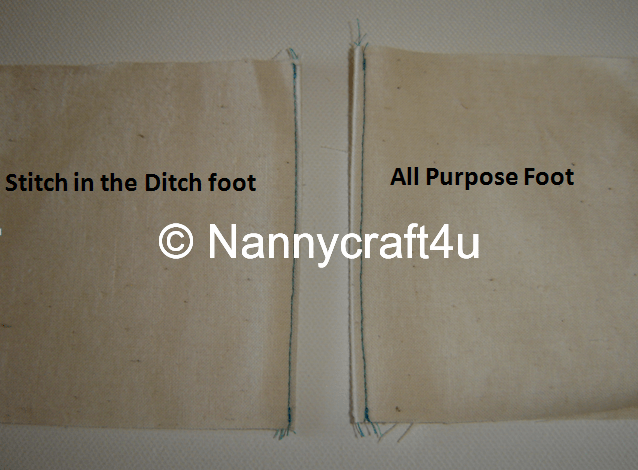
Stitch the seam, press to set the seam and then roll the seam between the finger and thumb. Press.
Attach the Stitch in the Ditch Foot

or attach the all Purpose Pressure Foot

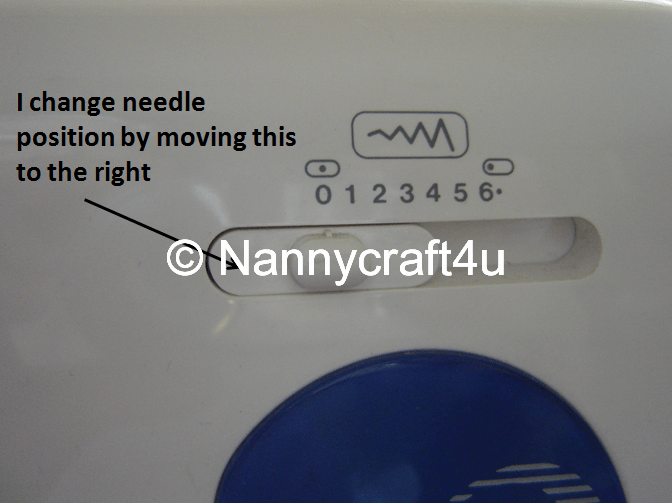
Either way works just as well (I made them different widths so you would know I did two samples!!)  You just have to remember to shift the needle to achieve the distance from the edge that you want.
Well done – that covers the techniques that are needed for the first Sewing Room Project!
Until next time
Nanny 🙂

Please share:

  • Share on Facebook (Opens in new window) Facebook
  • Email a link to a friend (Opens in new window) Email
  • Share on X (Opens in new window) X
  • Share on Pinterest (Opens in new window) Pinterest

Filed Under: LET'S SEW, SEWING/QUILTING, TIPS/TOOLS, TUTORIALS

  • « Previous Page
  • 1
  • …
  • 14
  • 15
  • 16
  • 17
  • 18
  • Next Page »

Welcome!

Welcome! I am Nanny and this is where I like to share my crafting as well as other snippets of our life in Australia. Read more

Social

Follow me on:

Like a Newsletter?

My Button4u

grab button for Nannycraft4u
<div class="nannycraft4u-button" style="width: 150px; margin: 0 auto;"> <a href="http://www.nannycraft4u.com.au" rel="nofollow"> <img src="http://i1168.photobucket.com/albums/r482/Nannycraft4u/logo8-001.jpg" alt="Nannycraft4u" width="150" height="150" /> </a> </div>

Looking for something?

Australian Women Bloggers Directory by Blog Chicks

Subscribe to Blog via Email

Enter your email address to subscribe to this blog and receive notifications of new posts by email.

Follow on Facebook

Follow on Facebook

Favourites

  • Curtain Tie Backs
    Curtain Tie Backs
  • Let's Sew 23 - How to make a simple Library Tote
    Let's Sew 23 - How to make a simple Library Tote
  • Make a lined,ruffle top, drawstring bag.
    Make a lined,ruffle top, drawstring bag.
  • Make a 9 patch block for Fire victims
    Make a 9 patch block for Fire victims
[instagram-feed]

Meta

  • Log in
  • Entries feed
  • Comments feed
  • WordPress.org

© Nannycraft4u

All content and images belong to Nannycraft4u unless otherwise indicated. You are welcome to link back to my blog, but you may not copy whole posts, tutorials or photos without my permission. Please give credit for my work and link back to the original post at Nannycraft4u.com If you use one of my ideas, I would love to know about it. Designs and tutorials are for personal use only.

Copyright © 2026 · Lifestyle Pro Theme on Genesis Framework · WordPress · Log in